The Scrap Project: Kumihimo Bracelets
Materials:
Loome tool OR a small piece of cardboard
Scissors
Yarn
Kumihimo is a Japanese technique used to make braids. The bracelet in this tutorial is a 7-strand braid, but there are many variations on the Kumihimo cord. This is an easy project for kids to make friendship bracelets and requires very few materials. It’s a great way to use up yarn scraps! It does take some patience, but I’ve found that the repetitive motion used the make the cord can also be super relaxing. I’ve recorded a video of the process and saved it in my “Scrap” highlight on Instagram.

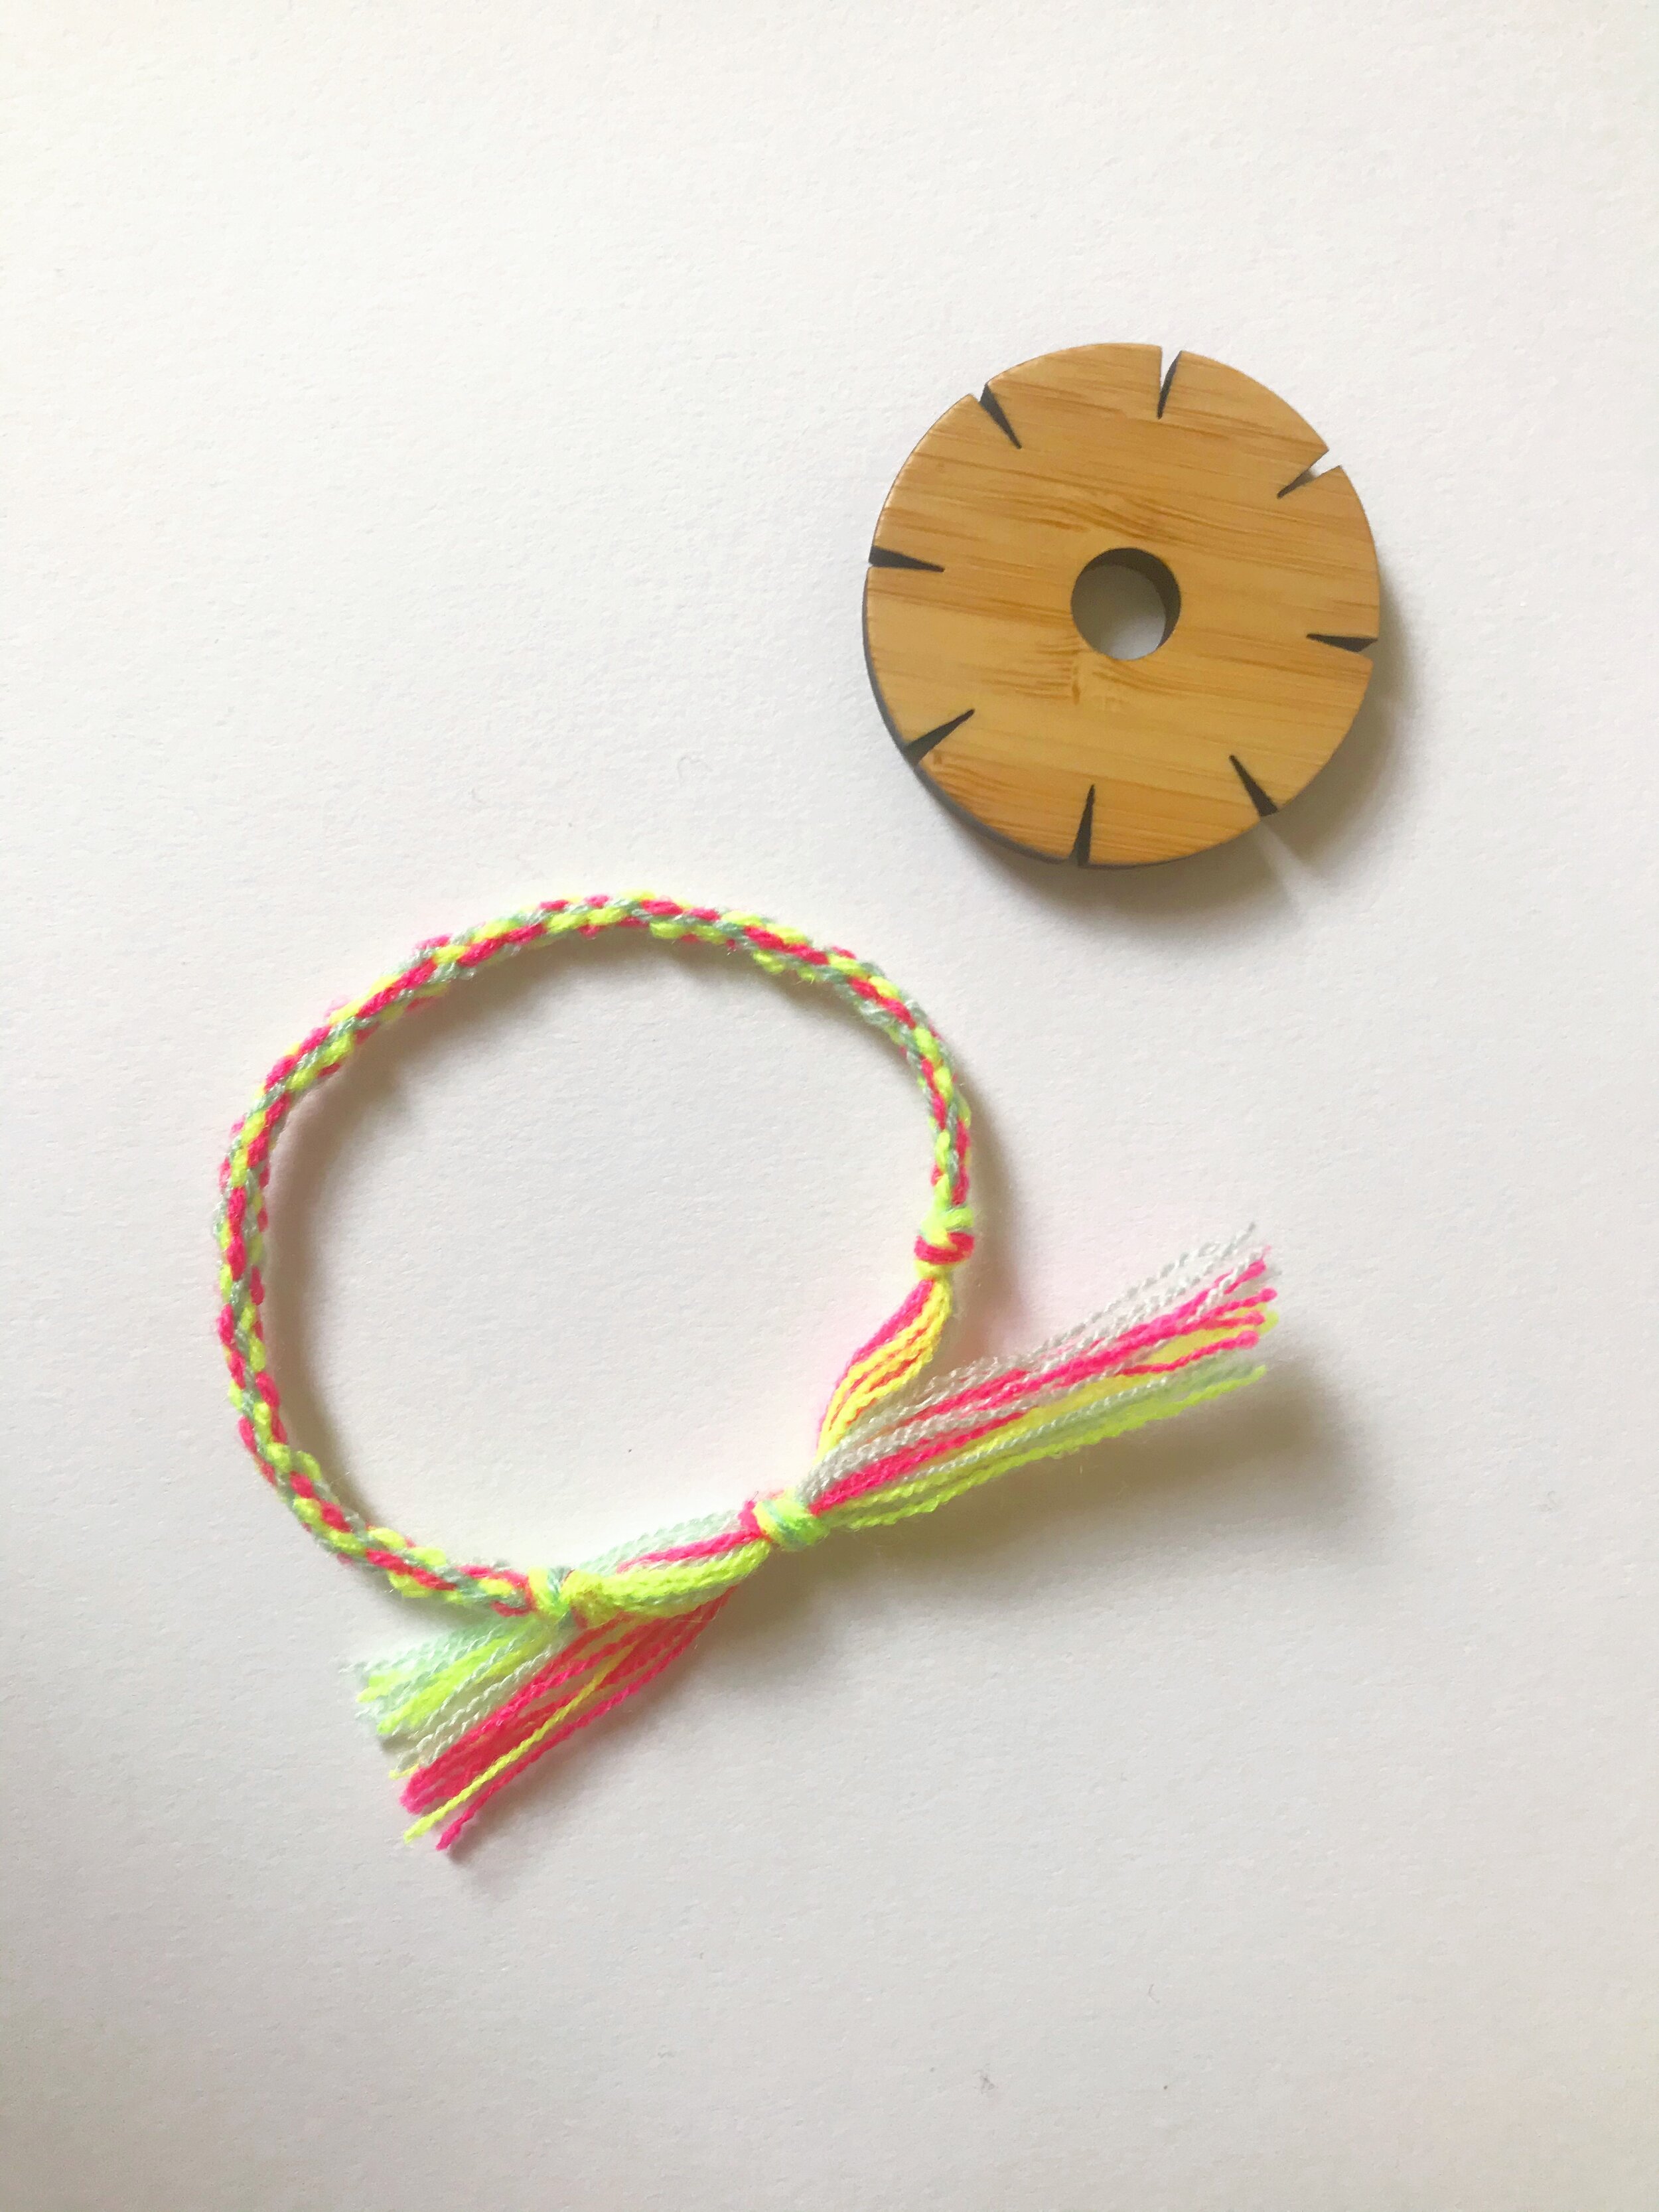
1. This is a Loome Kumihimo cord maker that I’ll be using for this tutorial. If you don’t have one of these at home, I’ll be showing you how to make your own in Step 4.
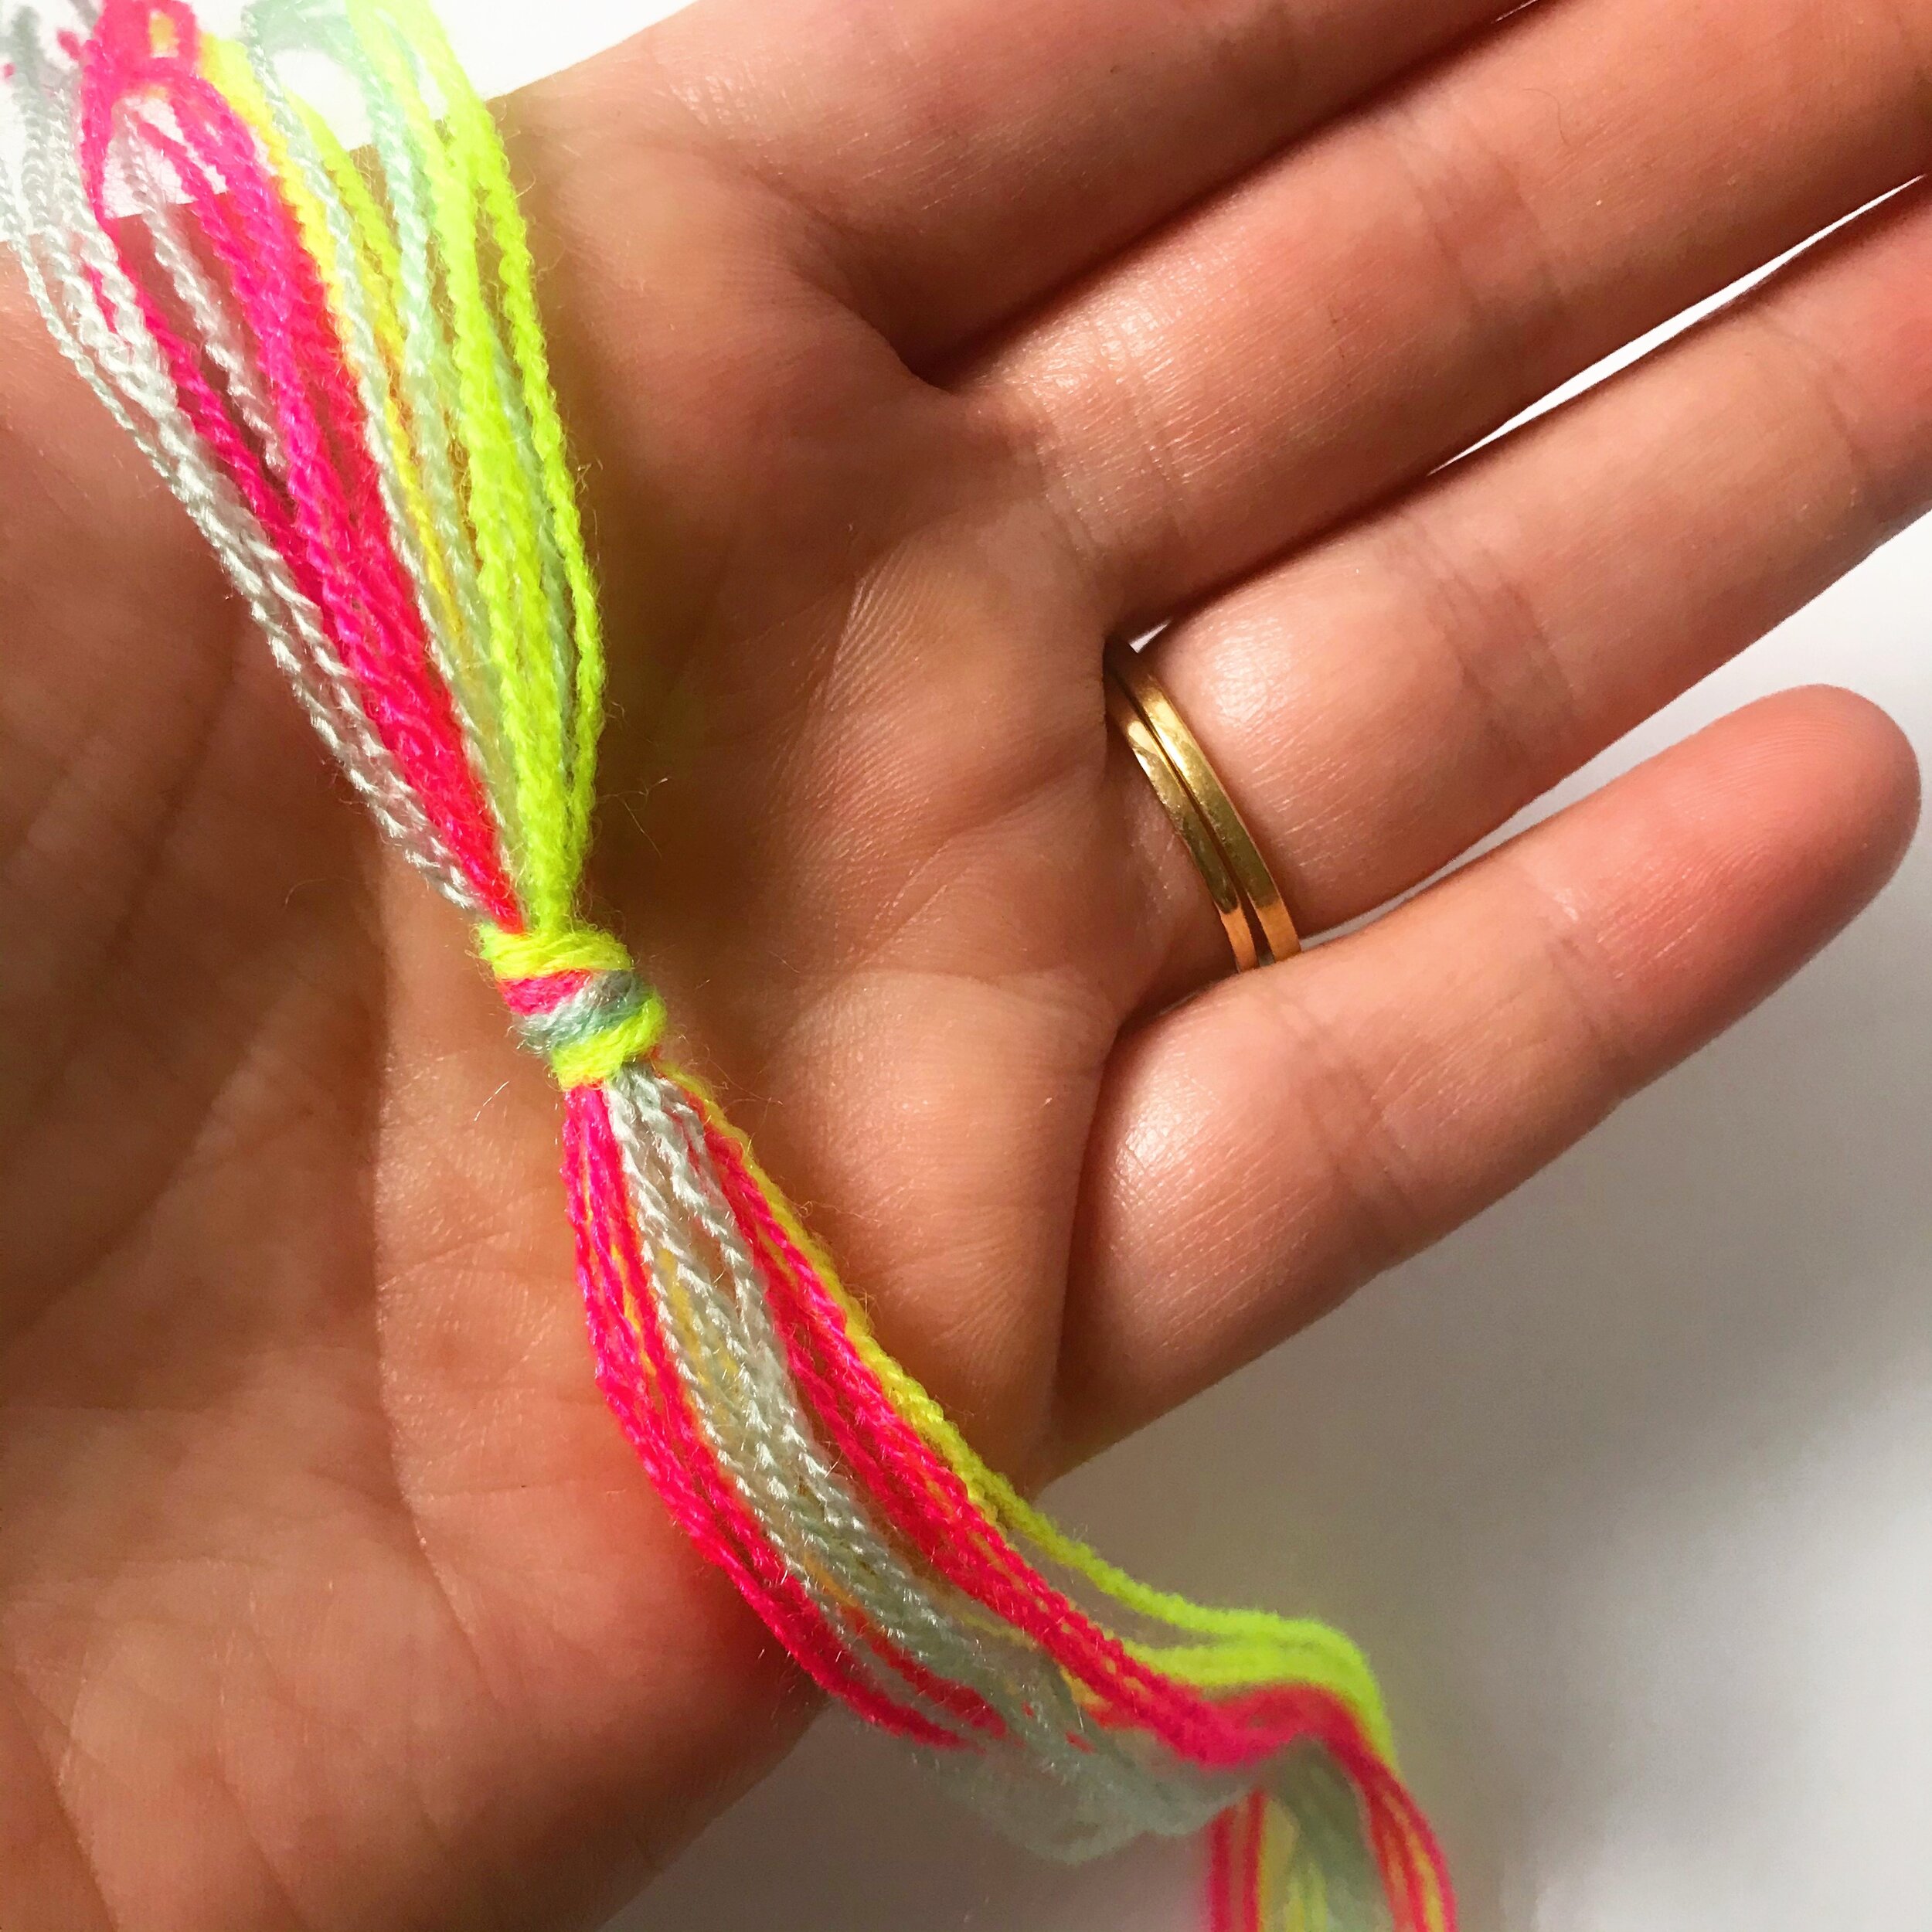
2. Cut 7 strands of yarn, string, or embroidery floss. Each strand should be ~24” for an adult-sized bracelet or ~18” for a child-sized bracelet. Tie the yarn in a knot, leaving a few inches at the end to tie your finished bracelet. (Note: I’m using a 3-strand yarn here, so it looks like more than 7 strands.)

3. Push the knotted end of your yarn into the center hole of your cord maker. Place each strand of yarn in a notch. One notch should be empty.

4. To make your own Kumihimo cord maker, cut a cardboard circle 2” in diameter.

5. Cut a small hole in the center. I had to cut into the cardboard to create the hole and then tape closed the space I had cut. Cut 8 small notches evenly spaced around the circle.
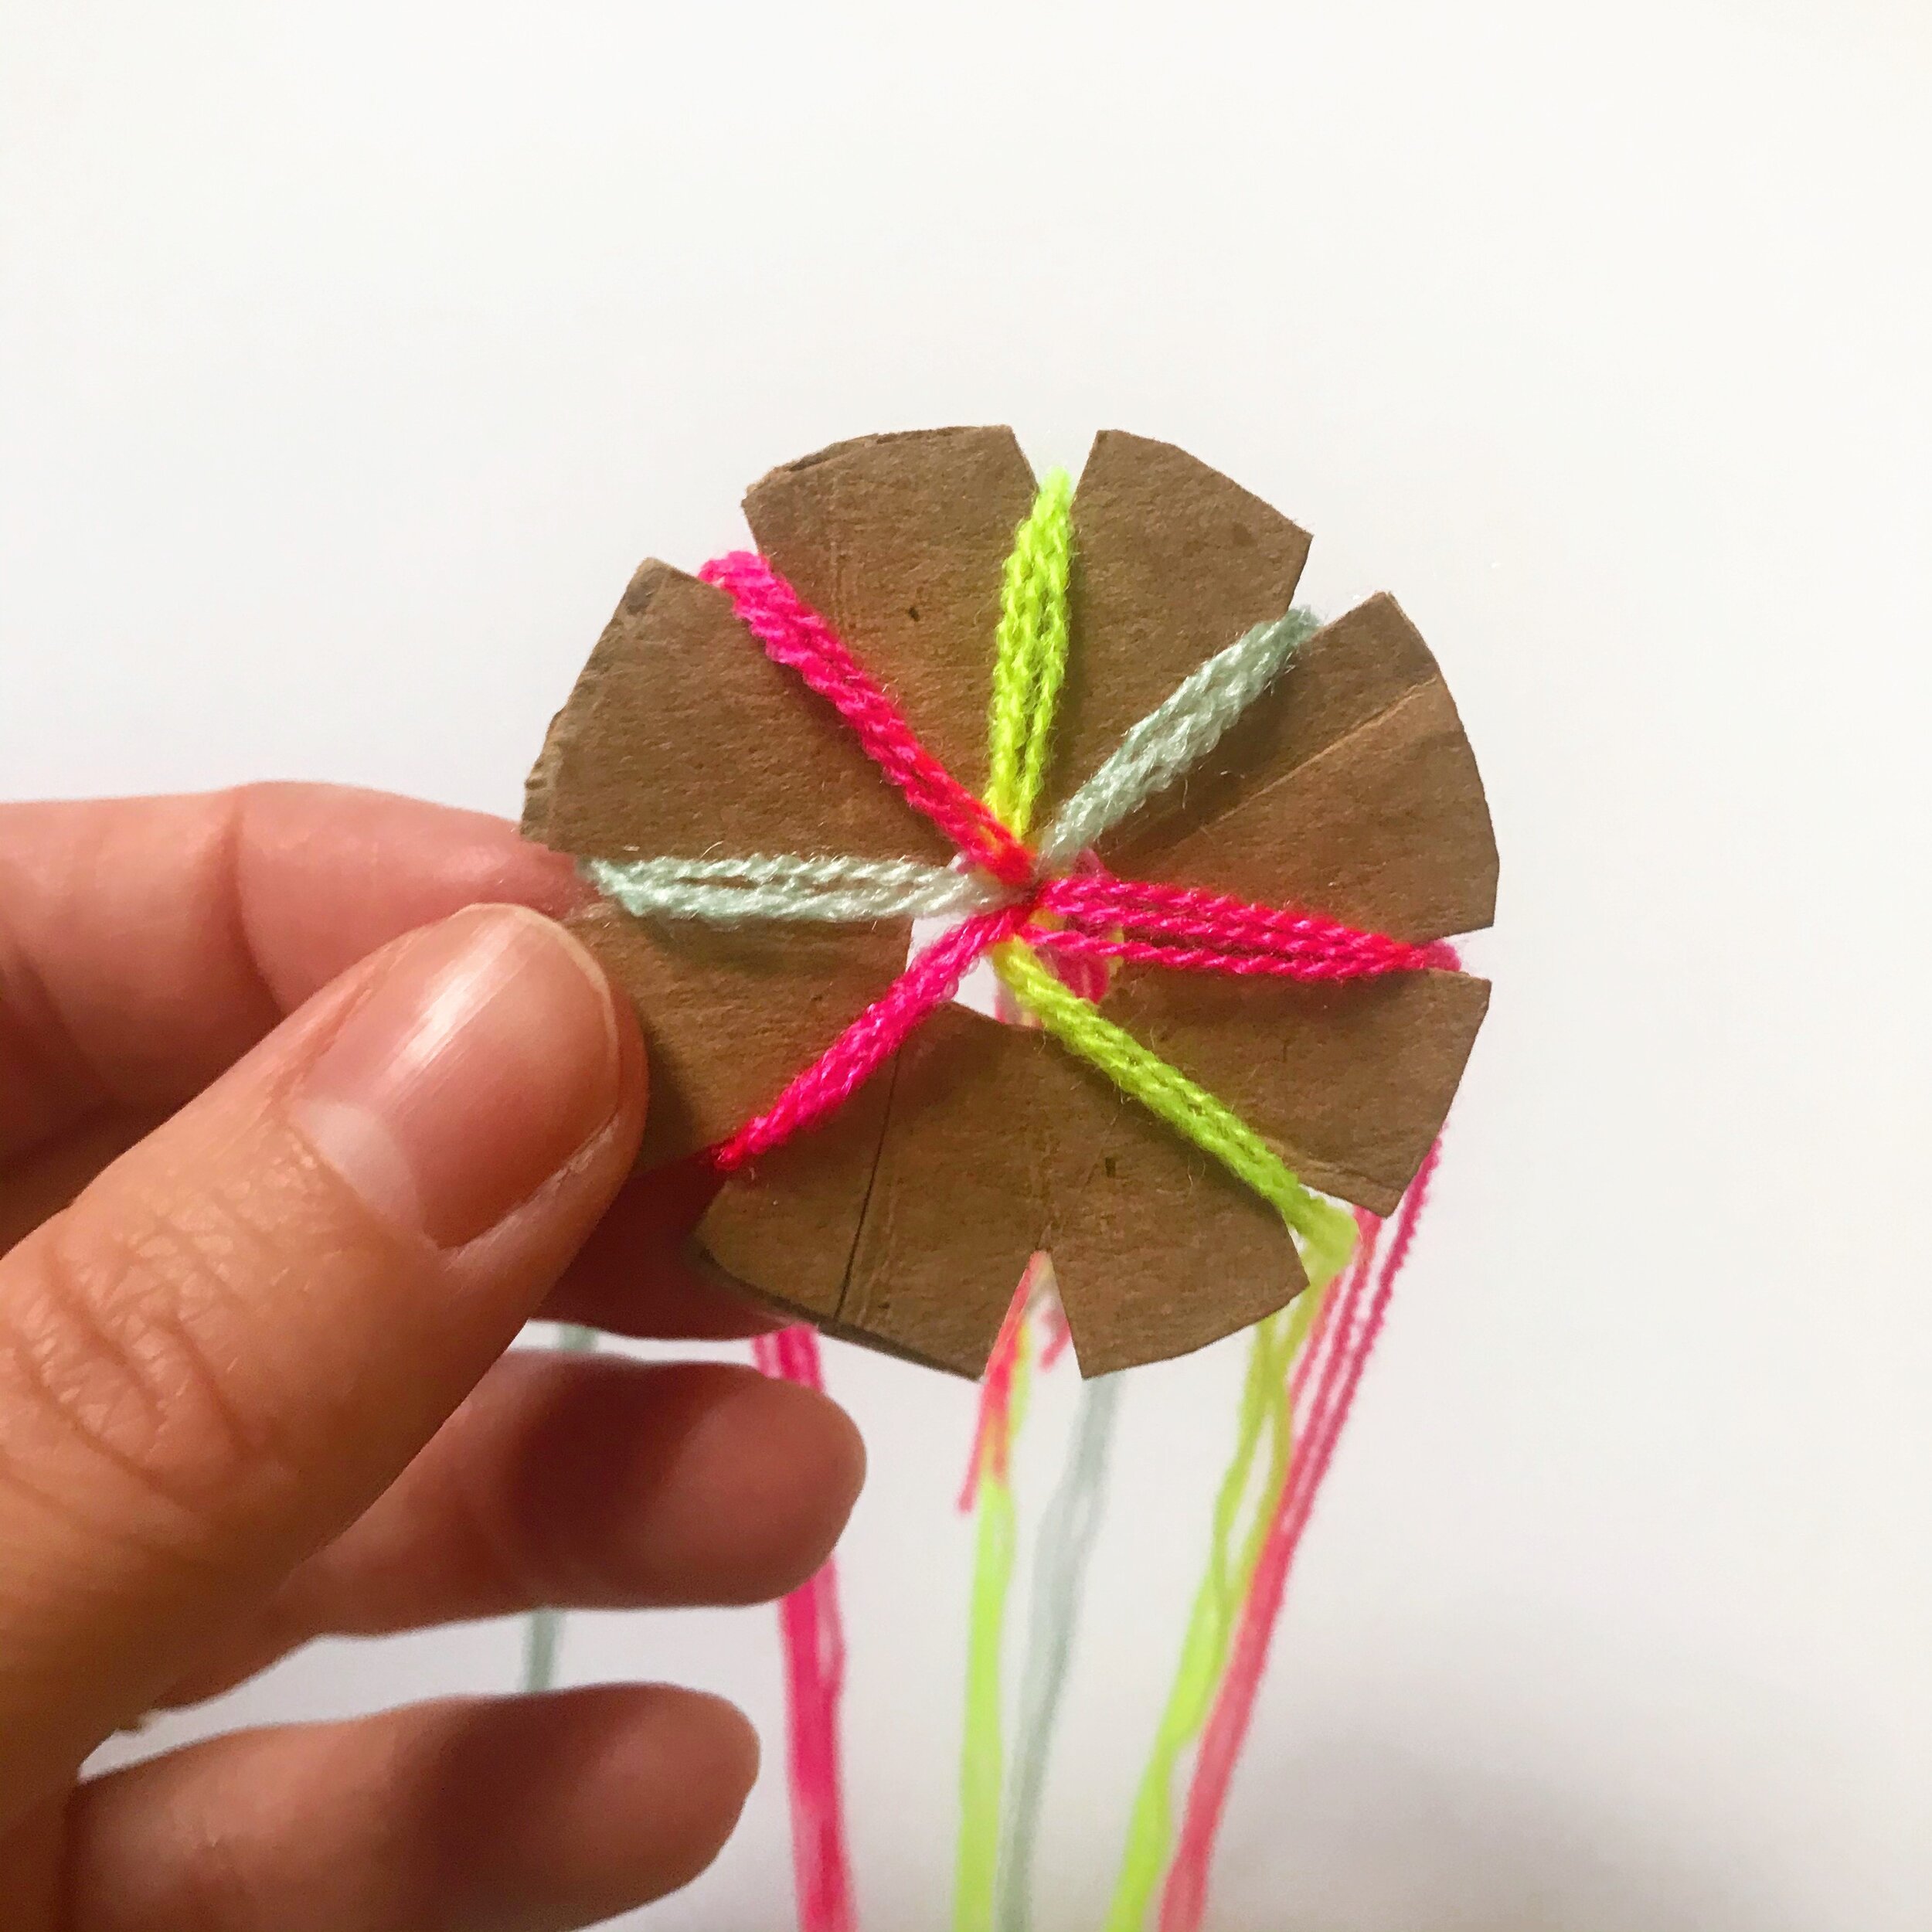
6. Push the knotted end of your yarn into the center hole of your cord maker. Distribute each of your 7 strands into a notch. One notch should be empty.

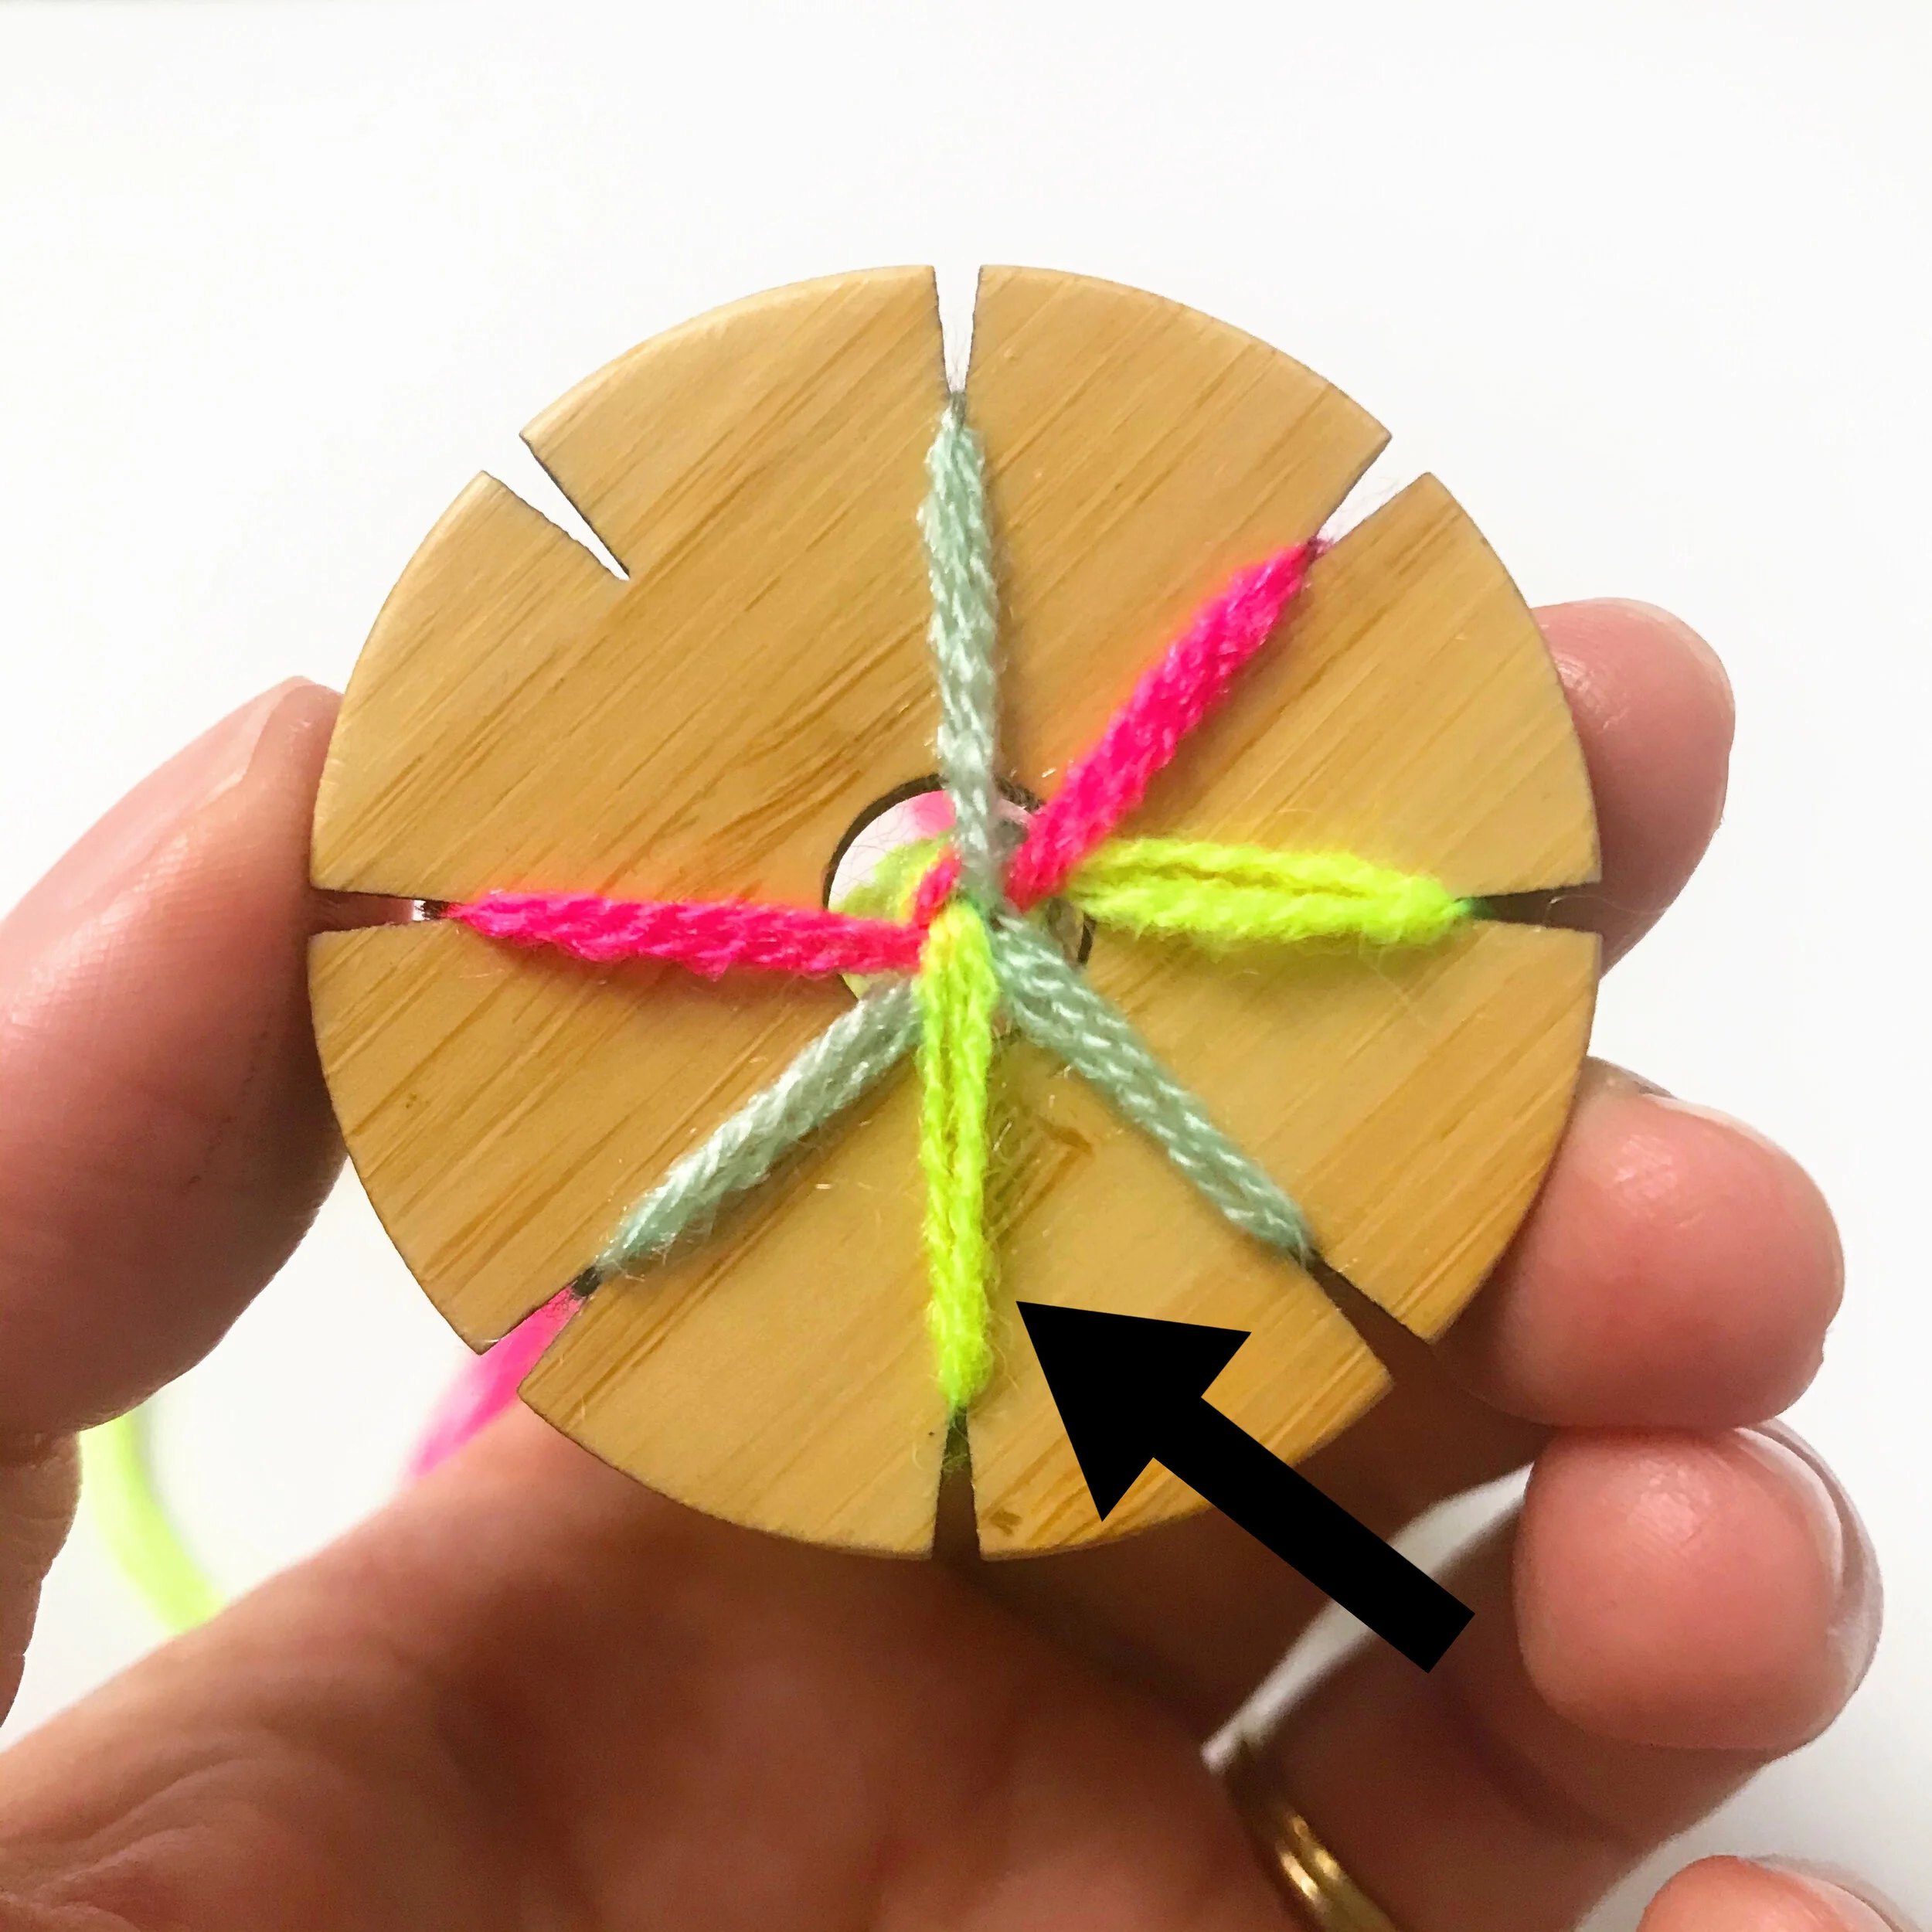
7. Turn the empty notch to the center, facing you.
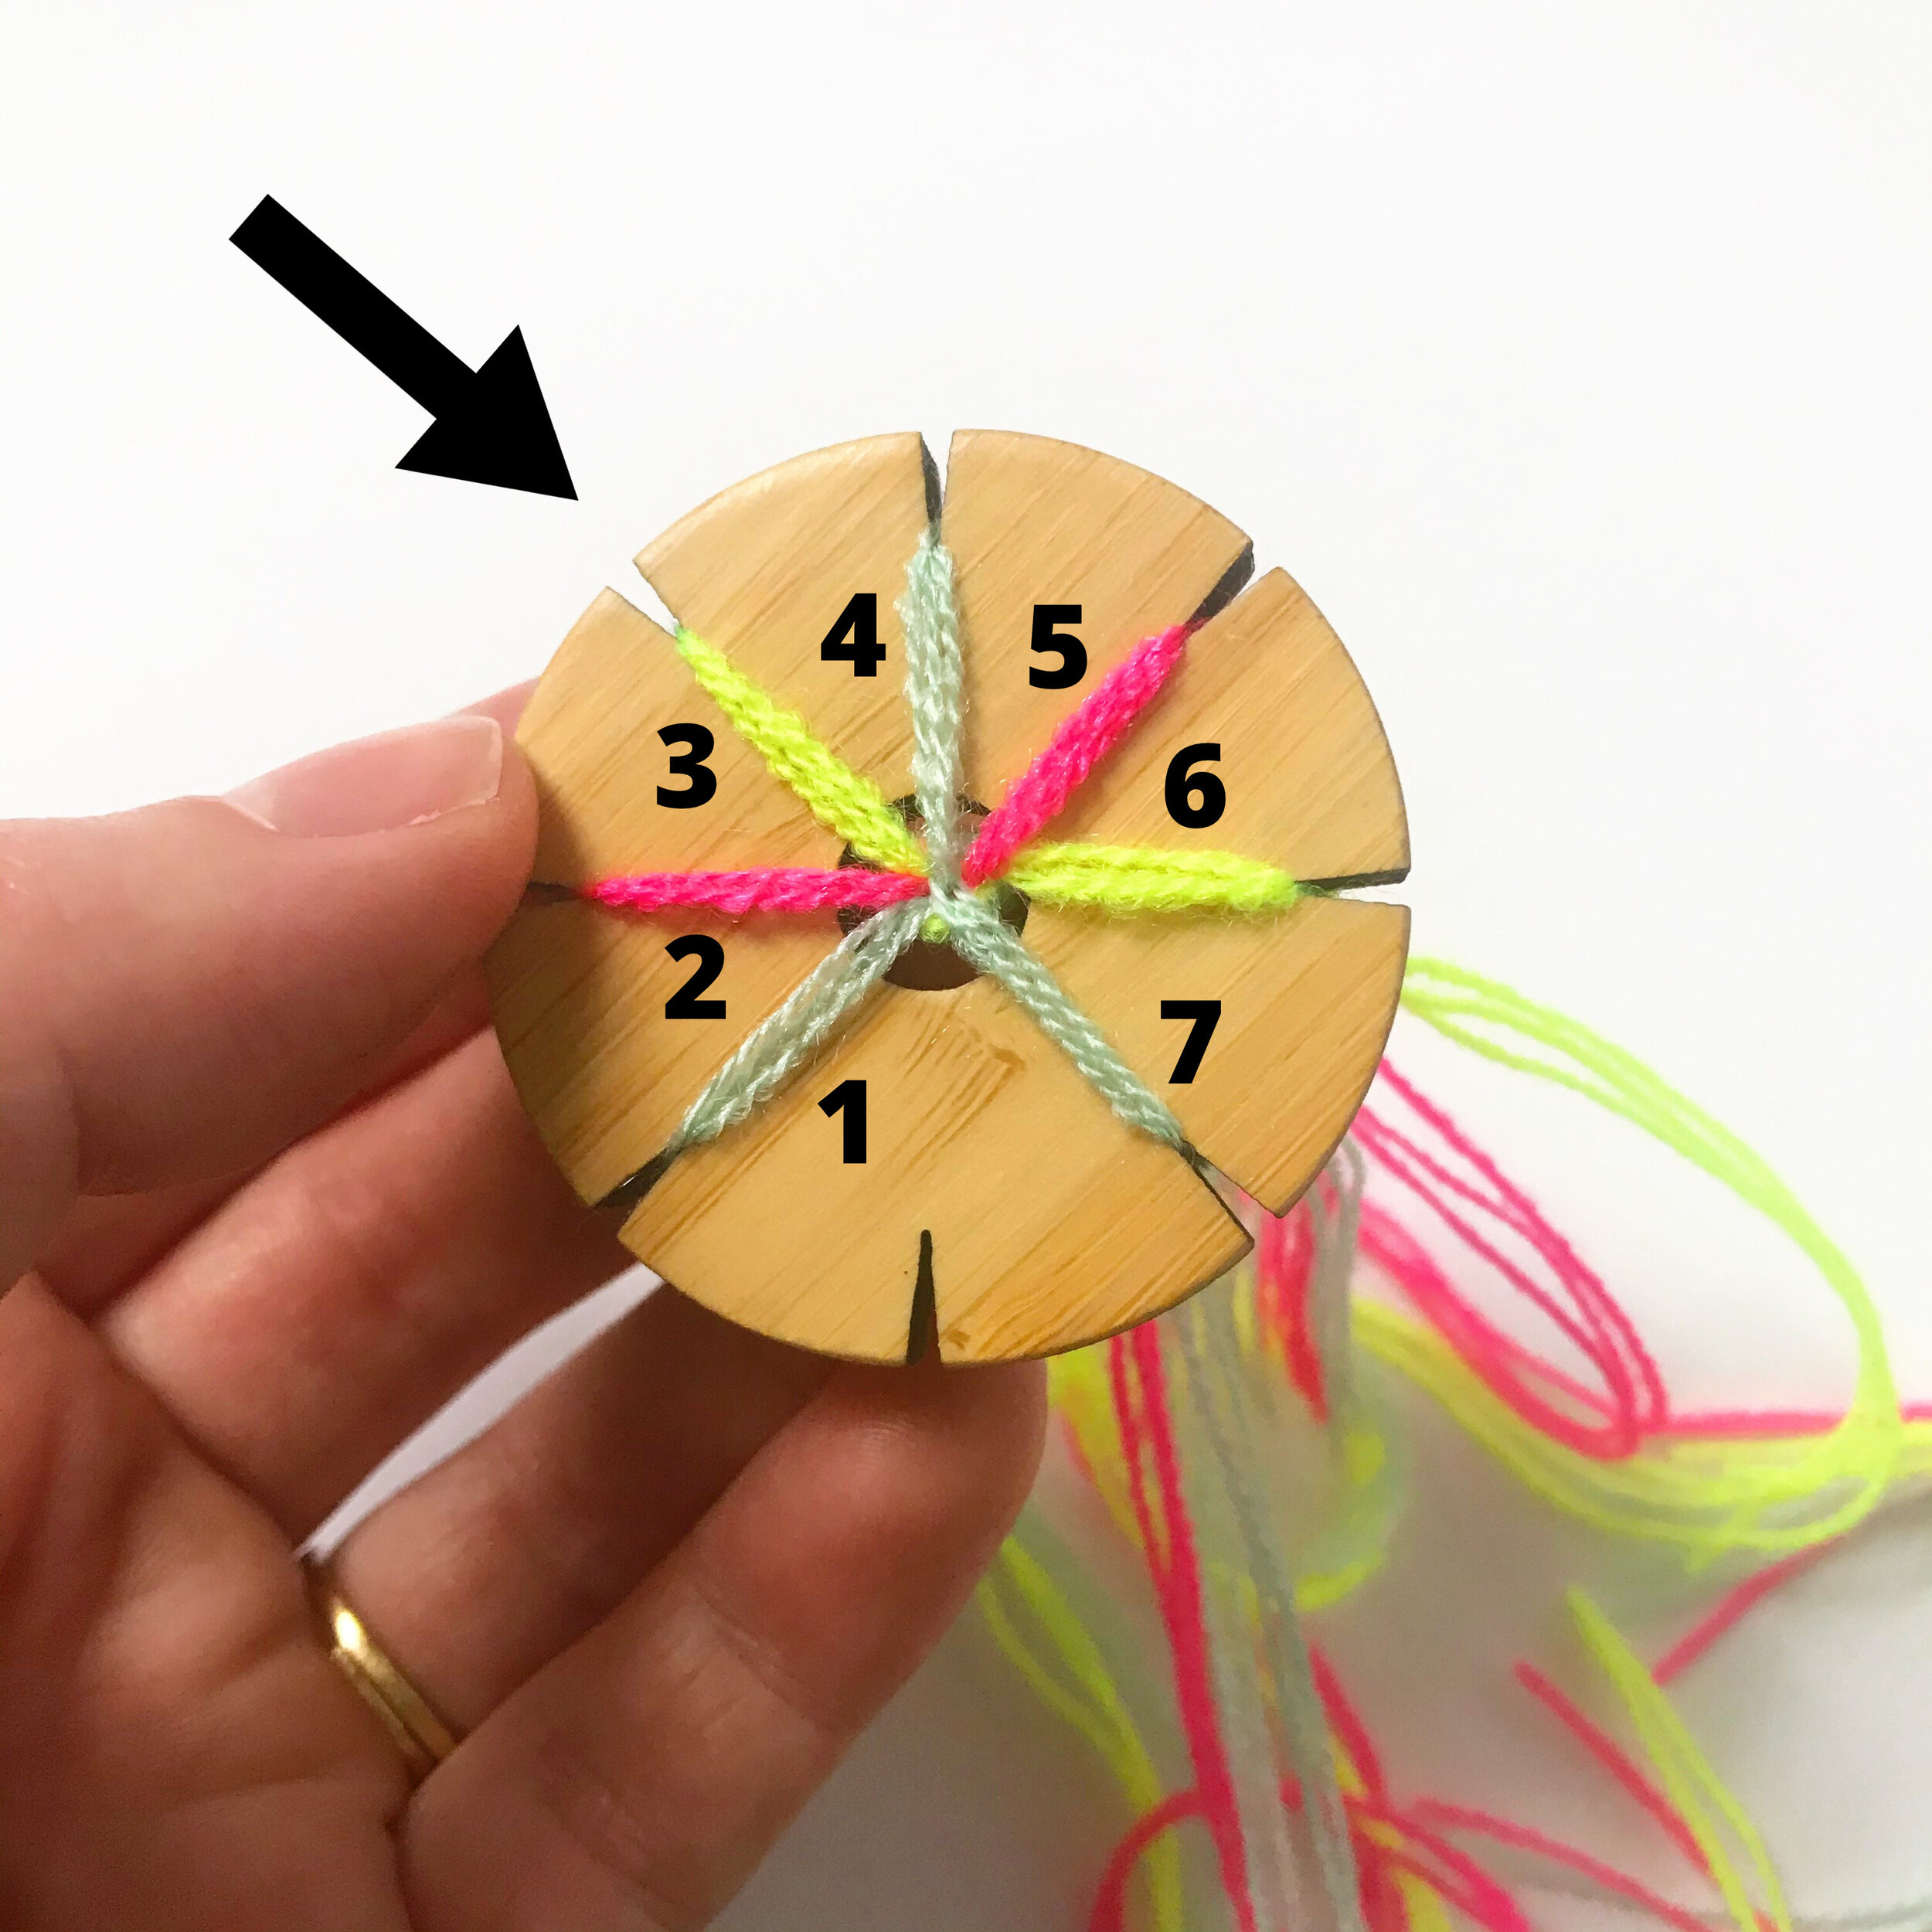
8. In a clockwise direction, count to the third piece of yarn from the empty notch.

9. Move that piece of yarn into the empty notch.
10. Now the notch facing you is full and the third notch is empty.

11. Turn the entire cord maker, so that the empty notch is facing you in the center.
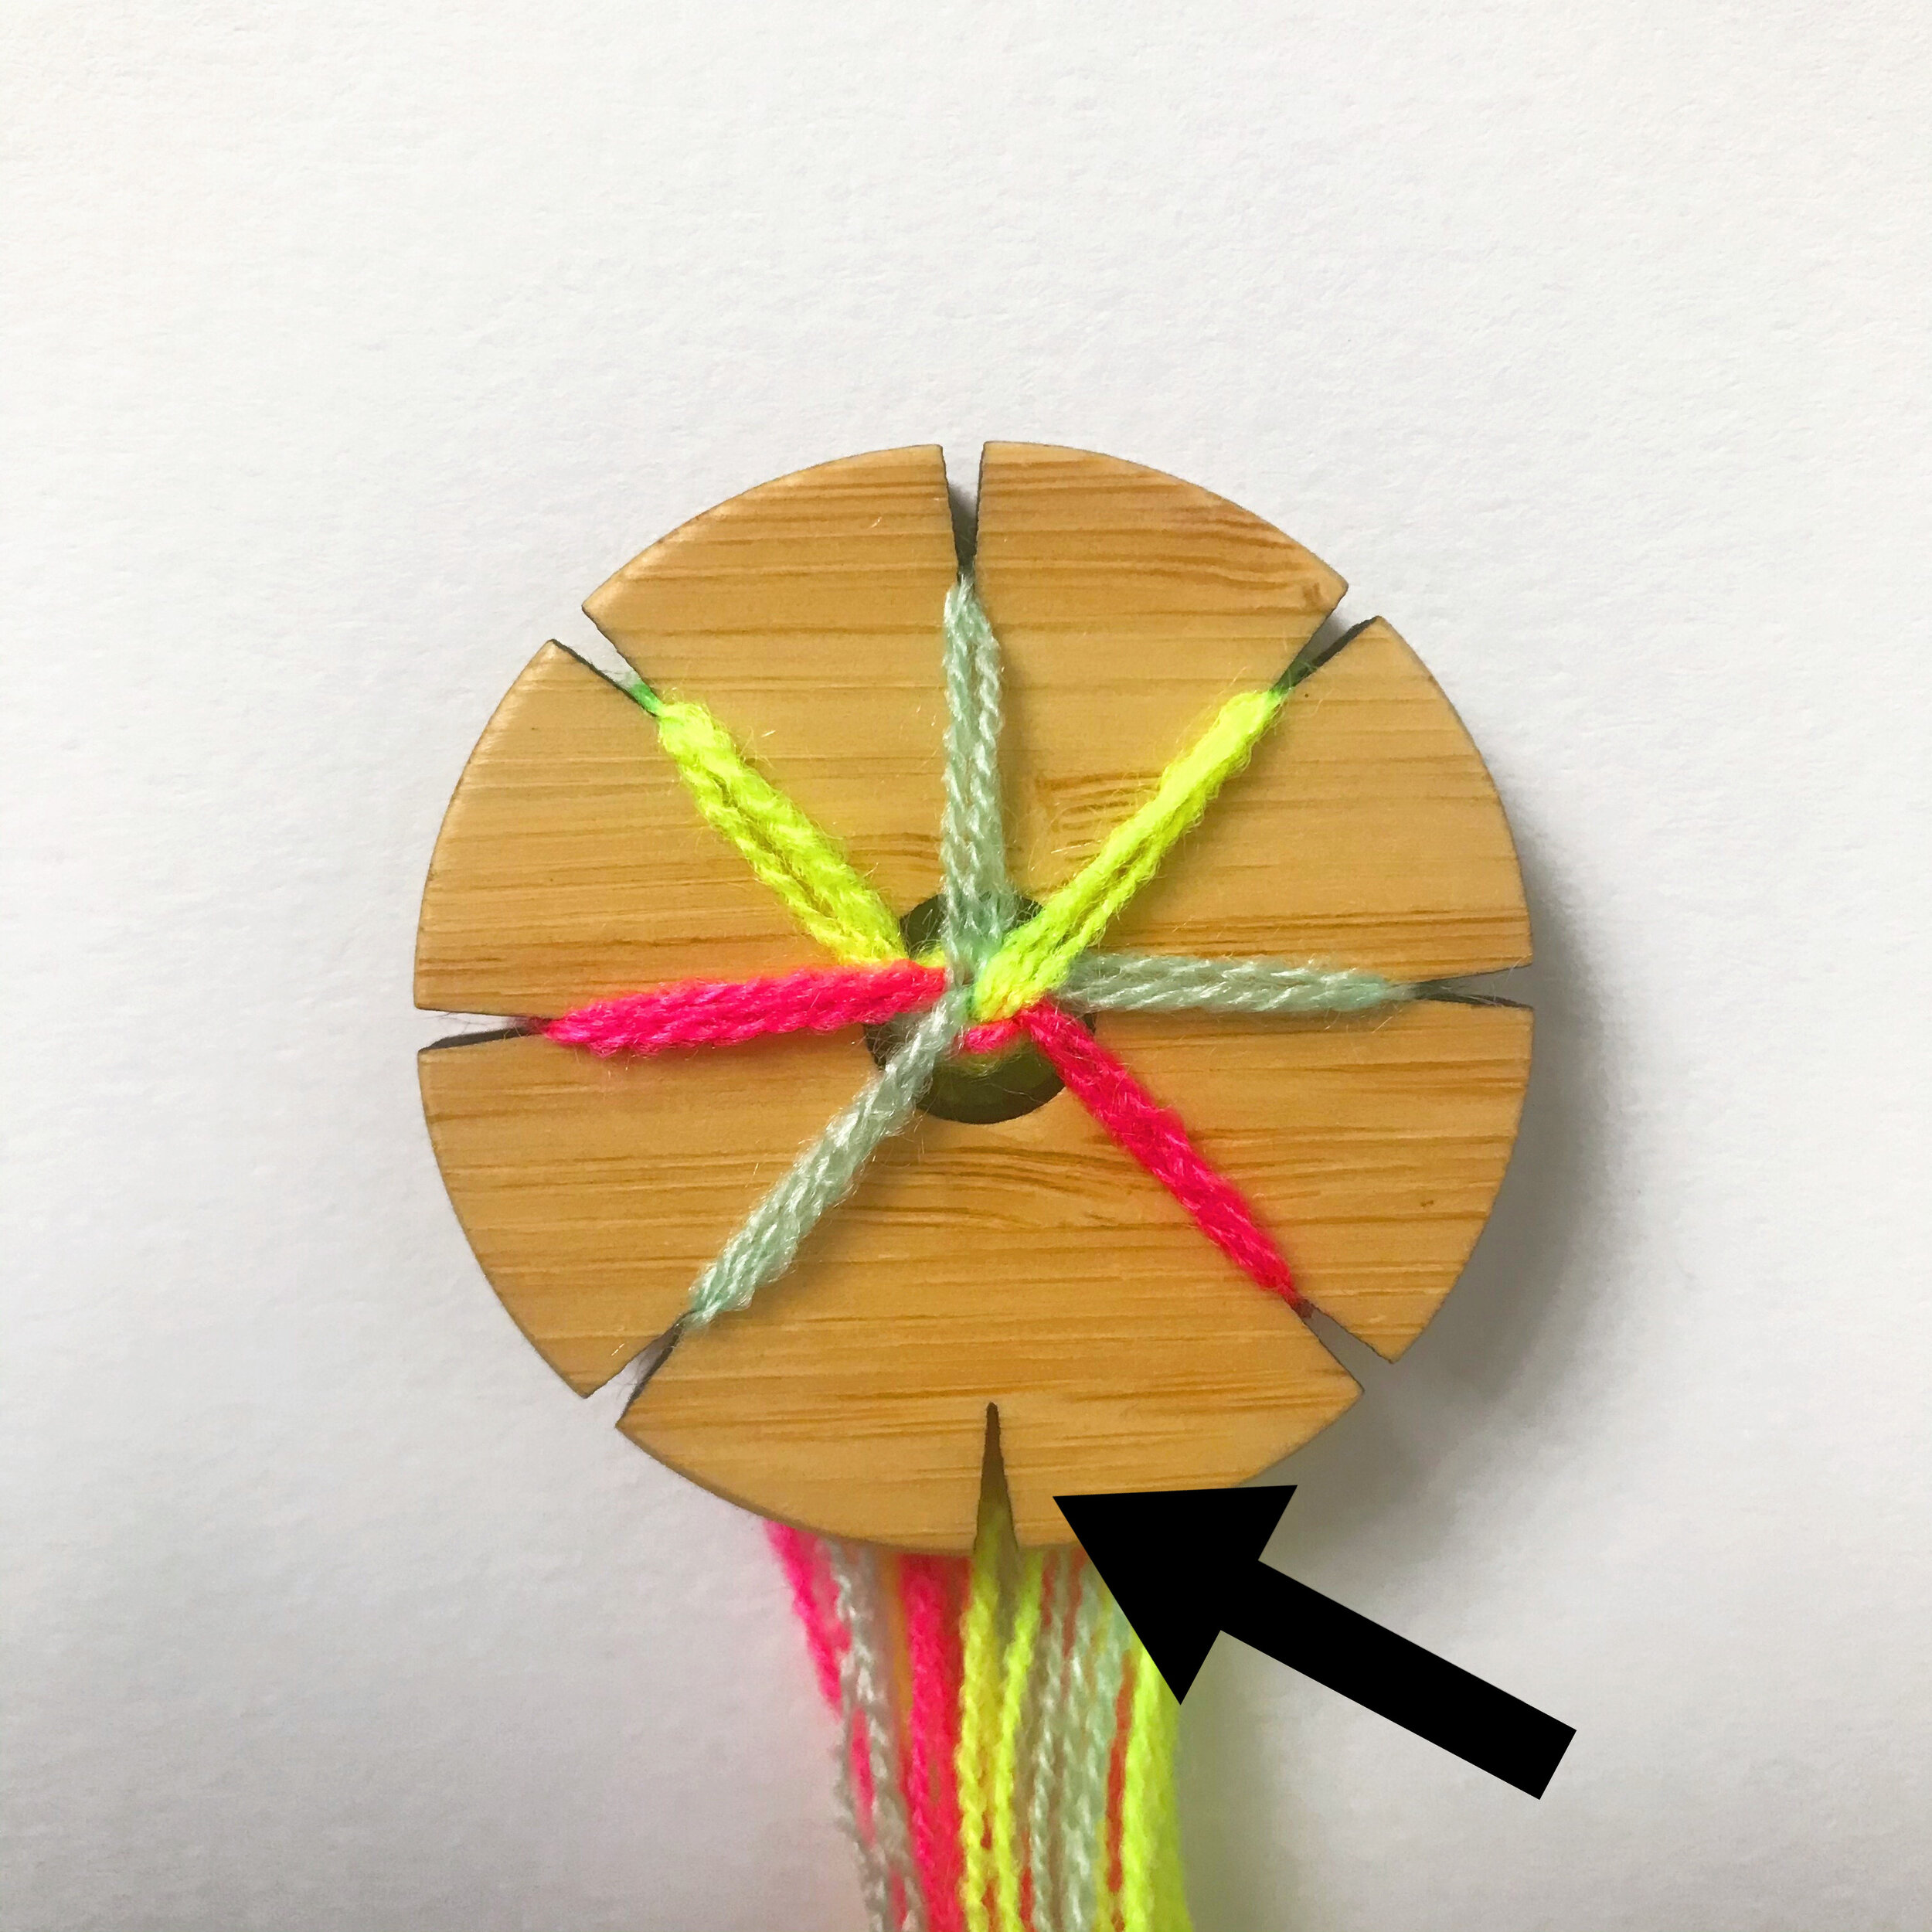
12. Now we’re ready to repeat Steps 7-11.
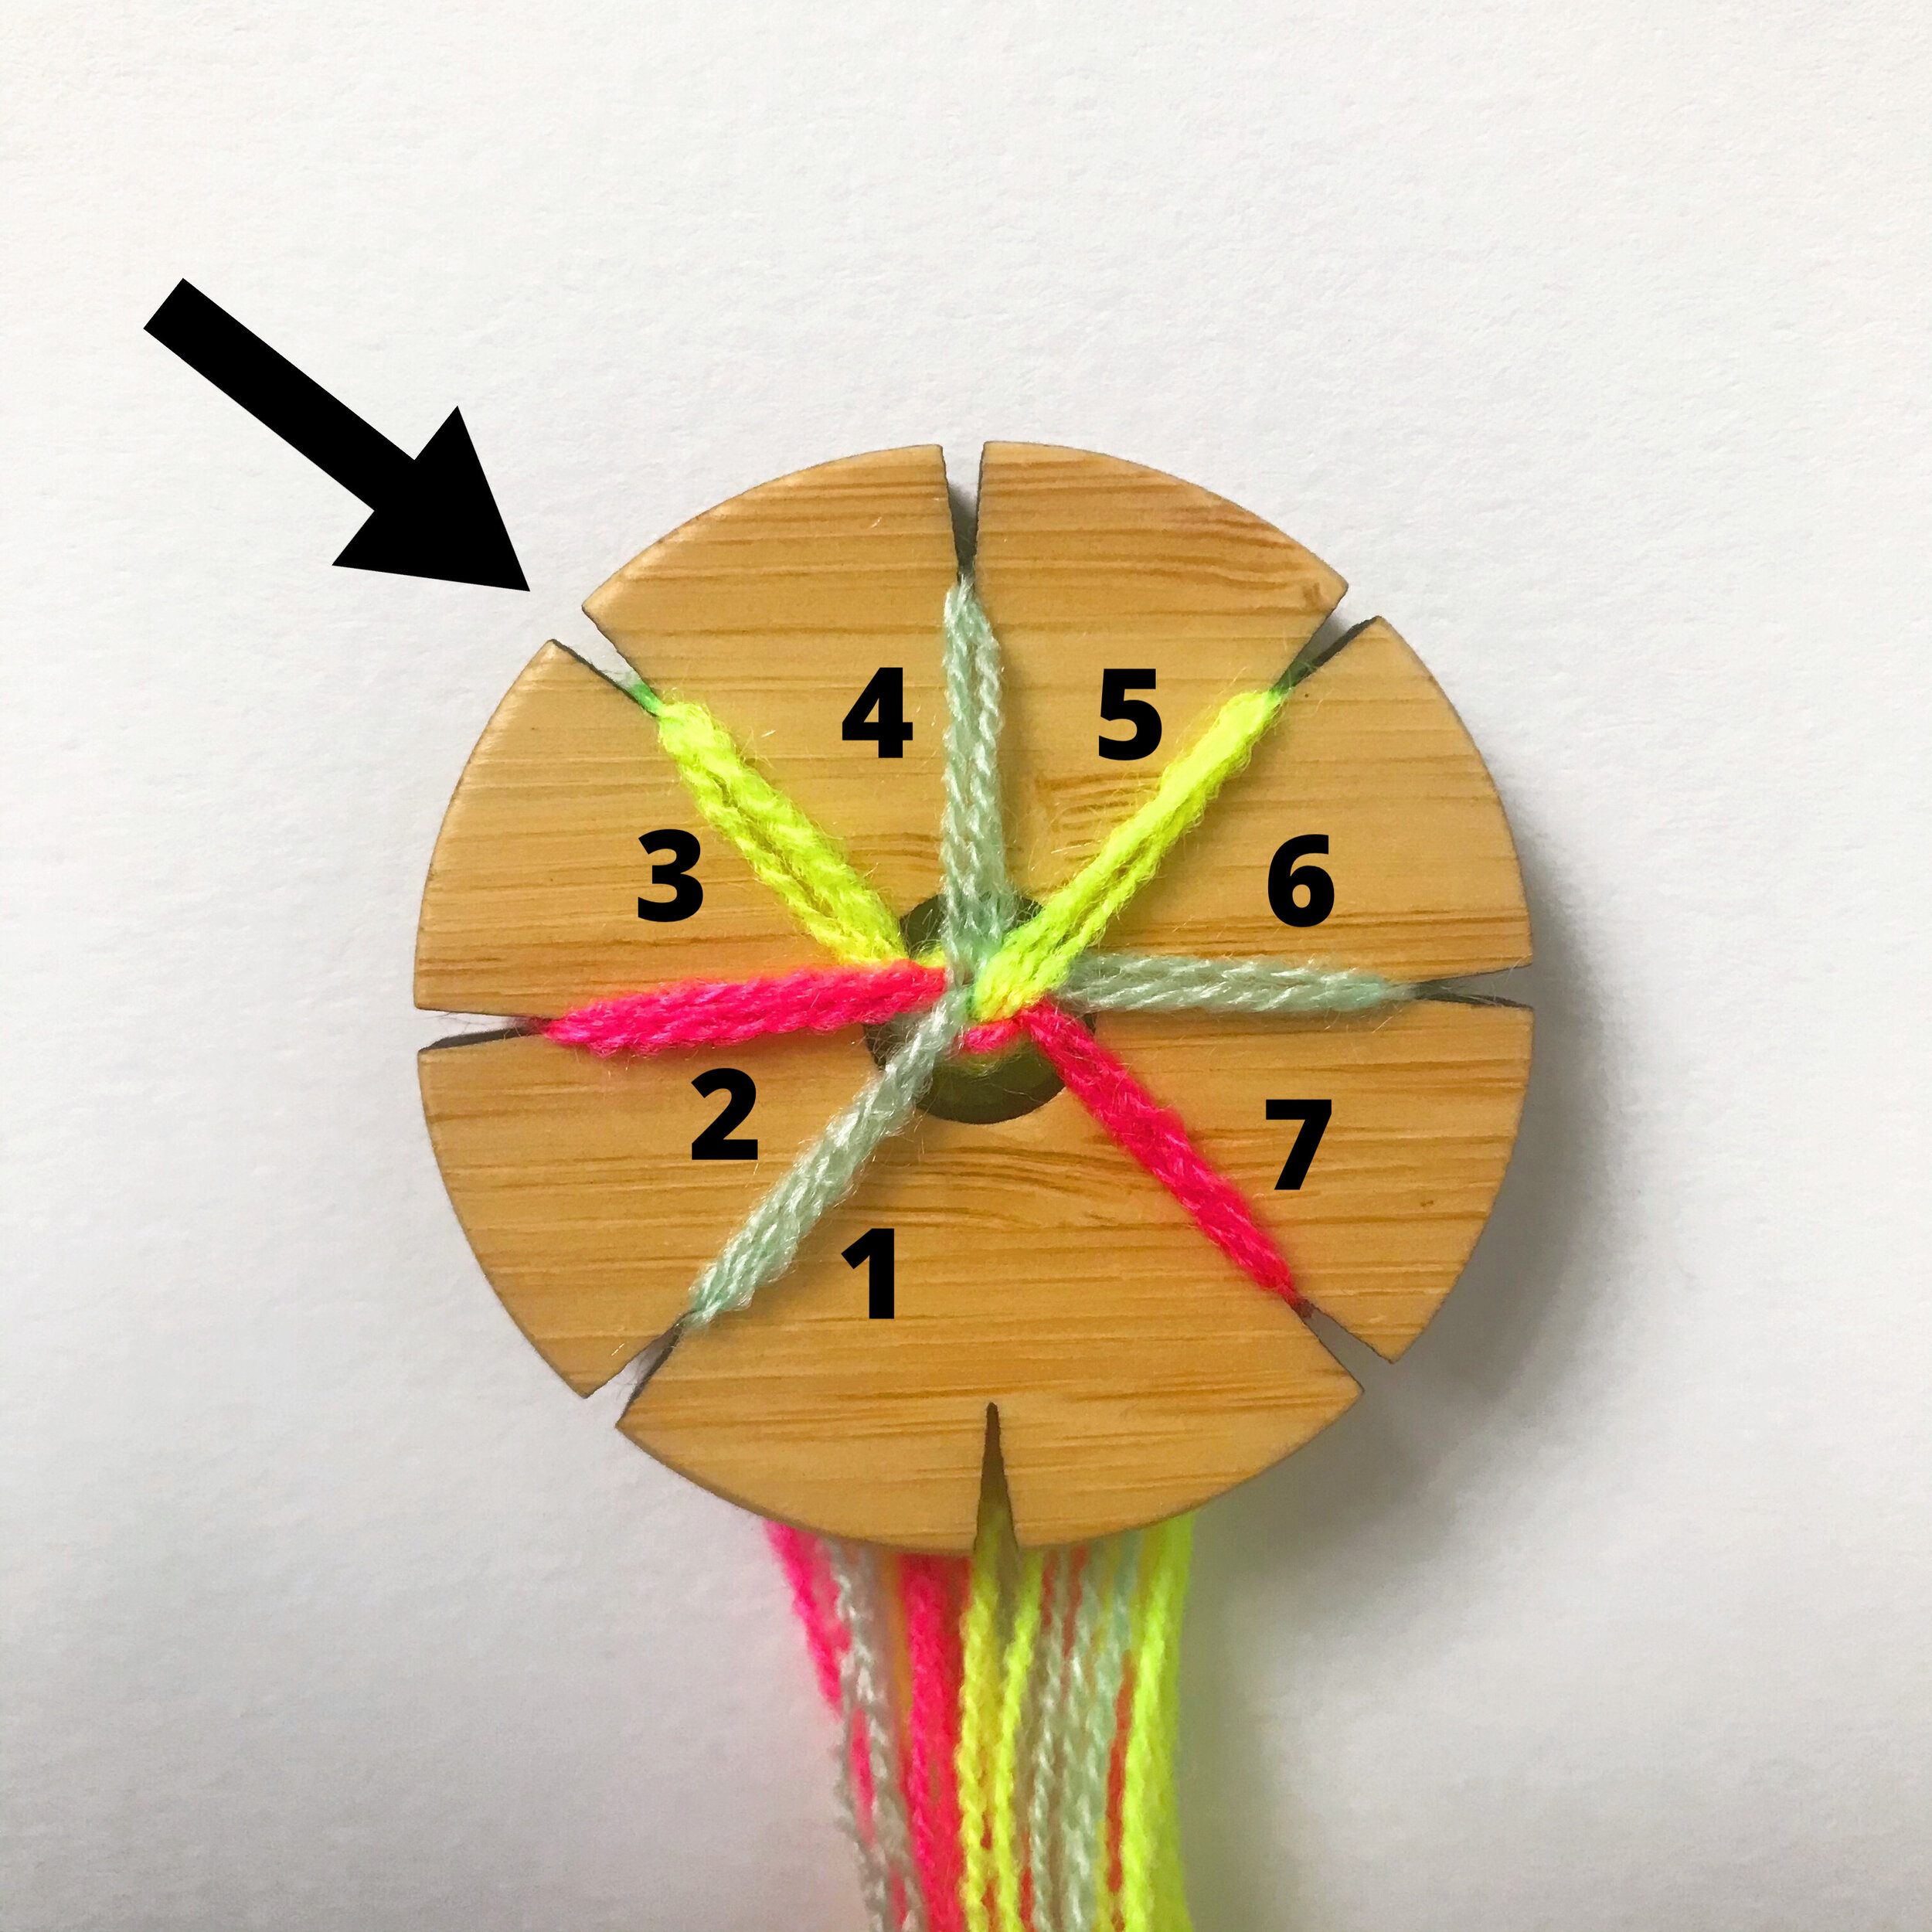
13. In a clockwise direction, count to the third piece of yarn from the empty notch.

14. Move that piece of yarn into the empty notch and then turn the entire cord maker, so that the empty notch is facing you in the center.

15. After several minutes of repeating this pattern, your Kumihimo cord should begin to emerge from the center of your cord maker. Be careful to keep your strands of yarn from getting tangled as you go.

16. When you’re satisfied with the length of your bracelet, remove your yarn from the cord maker.
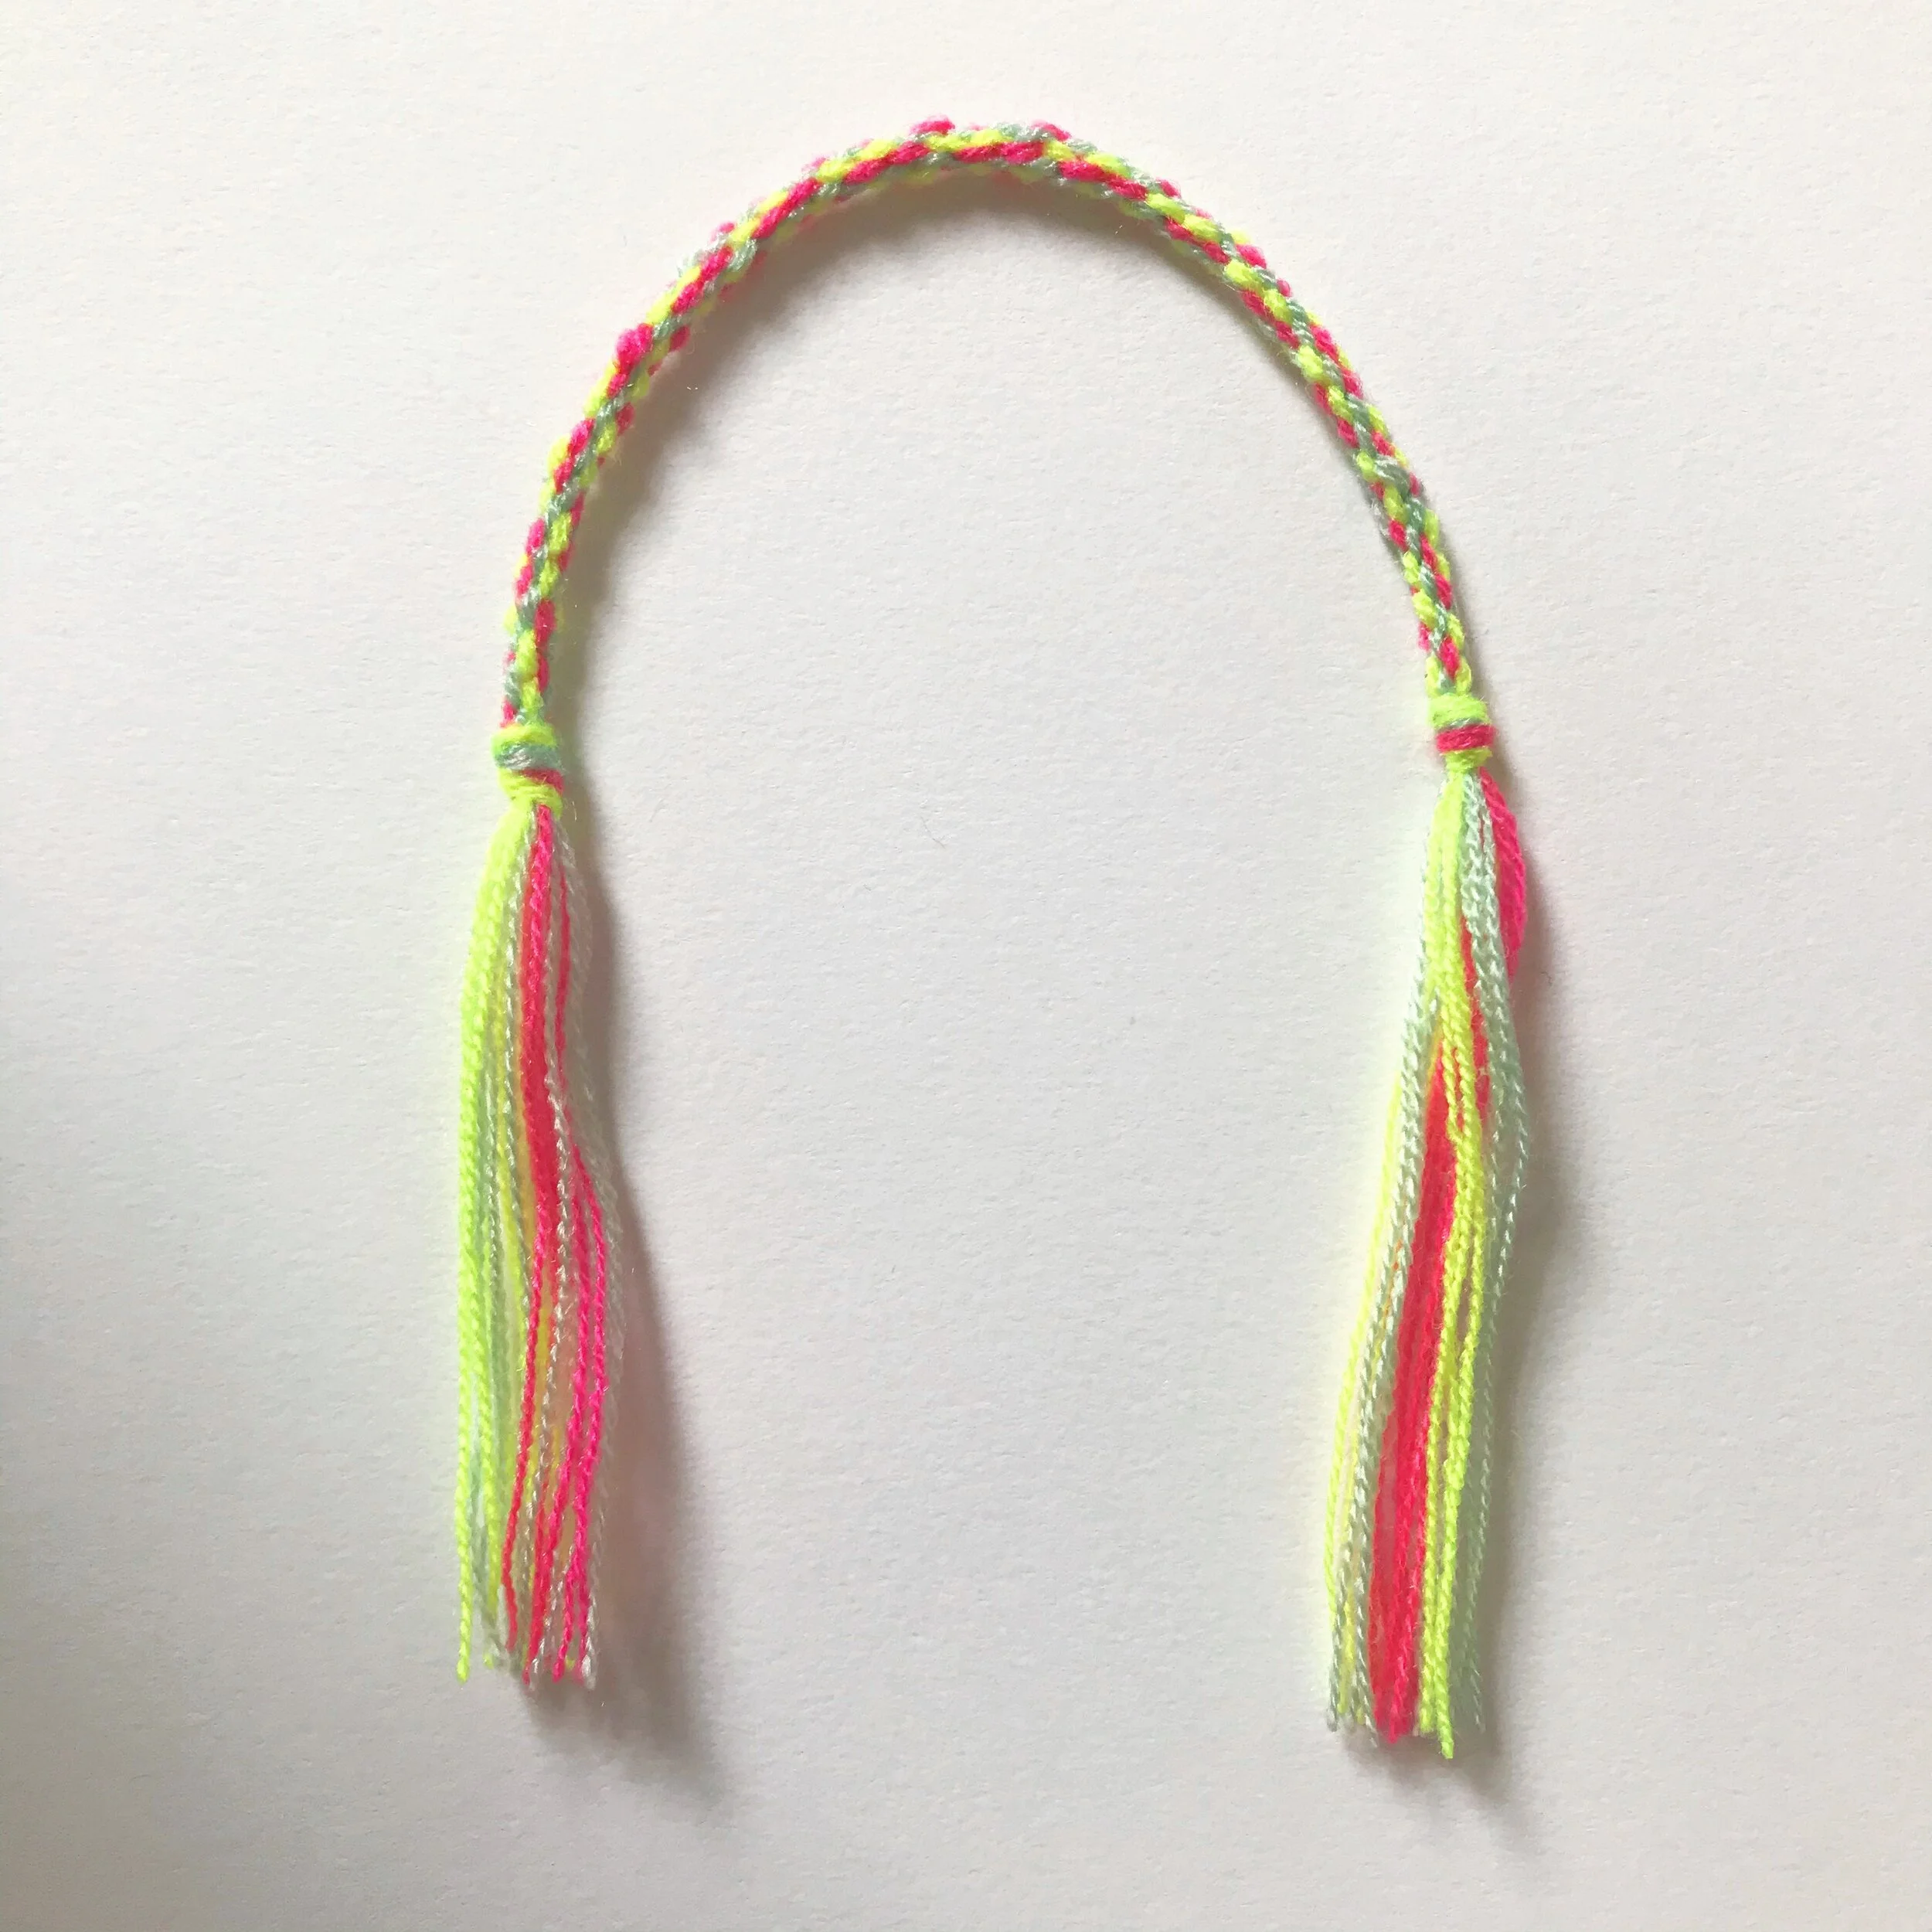
17. Knot the end to secure.
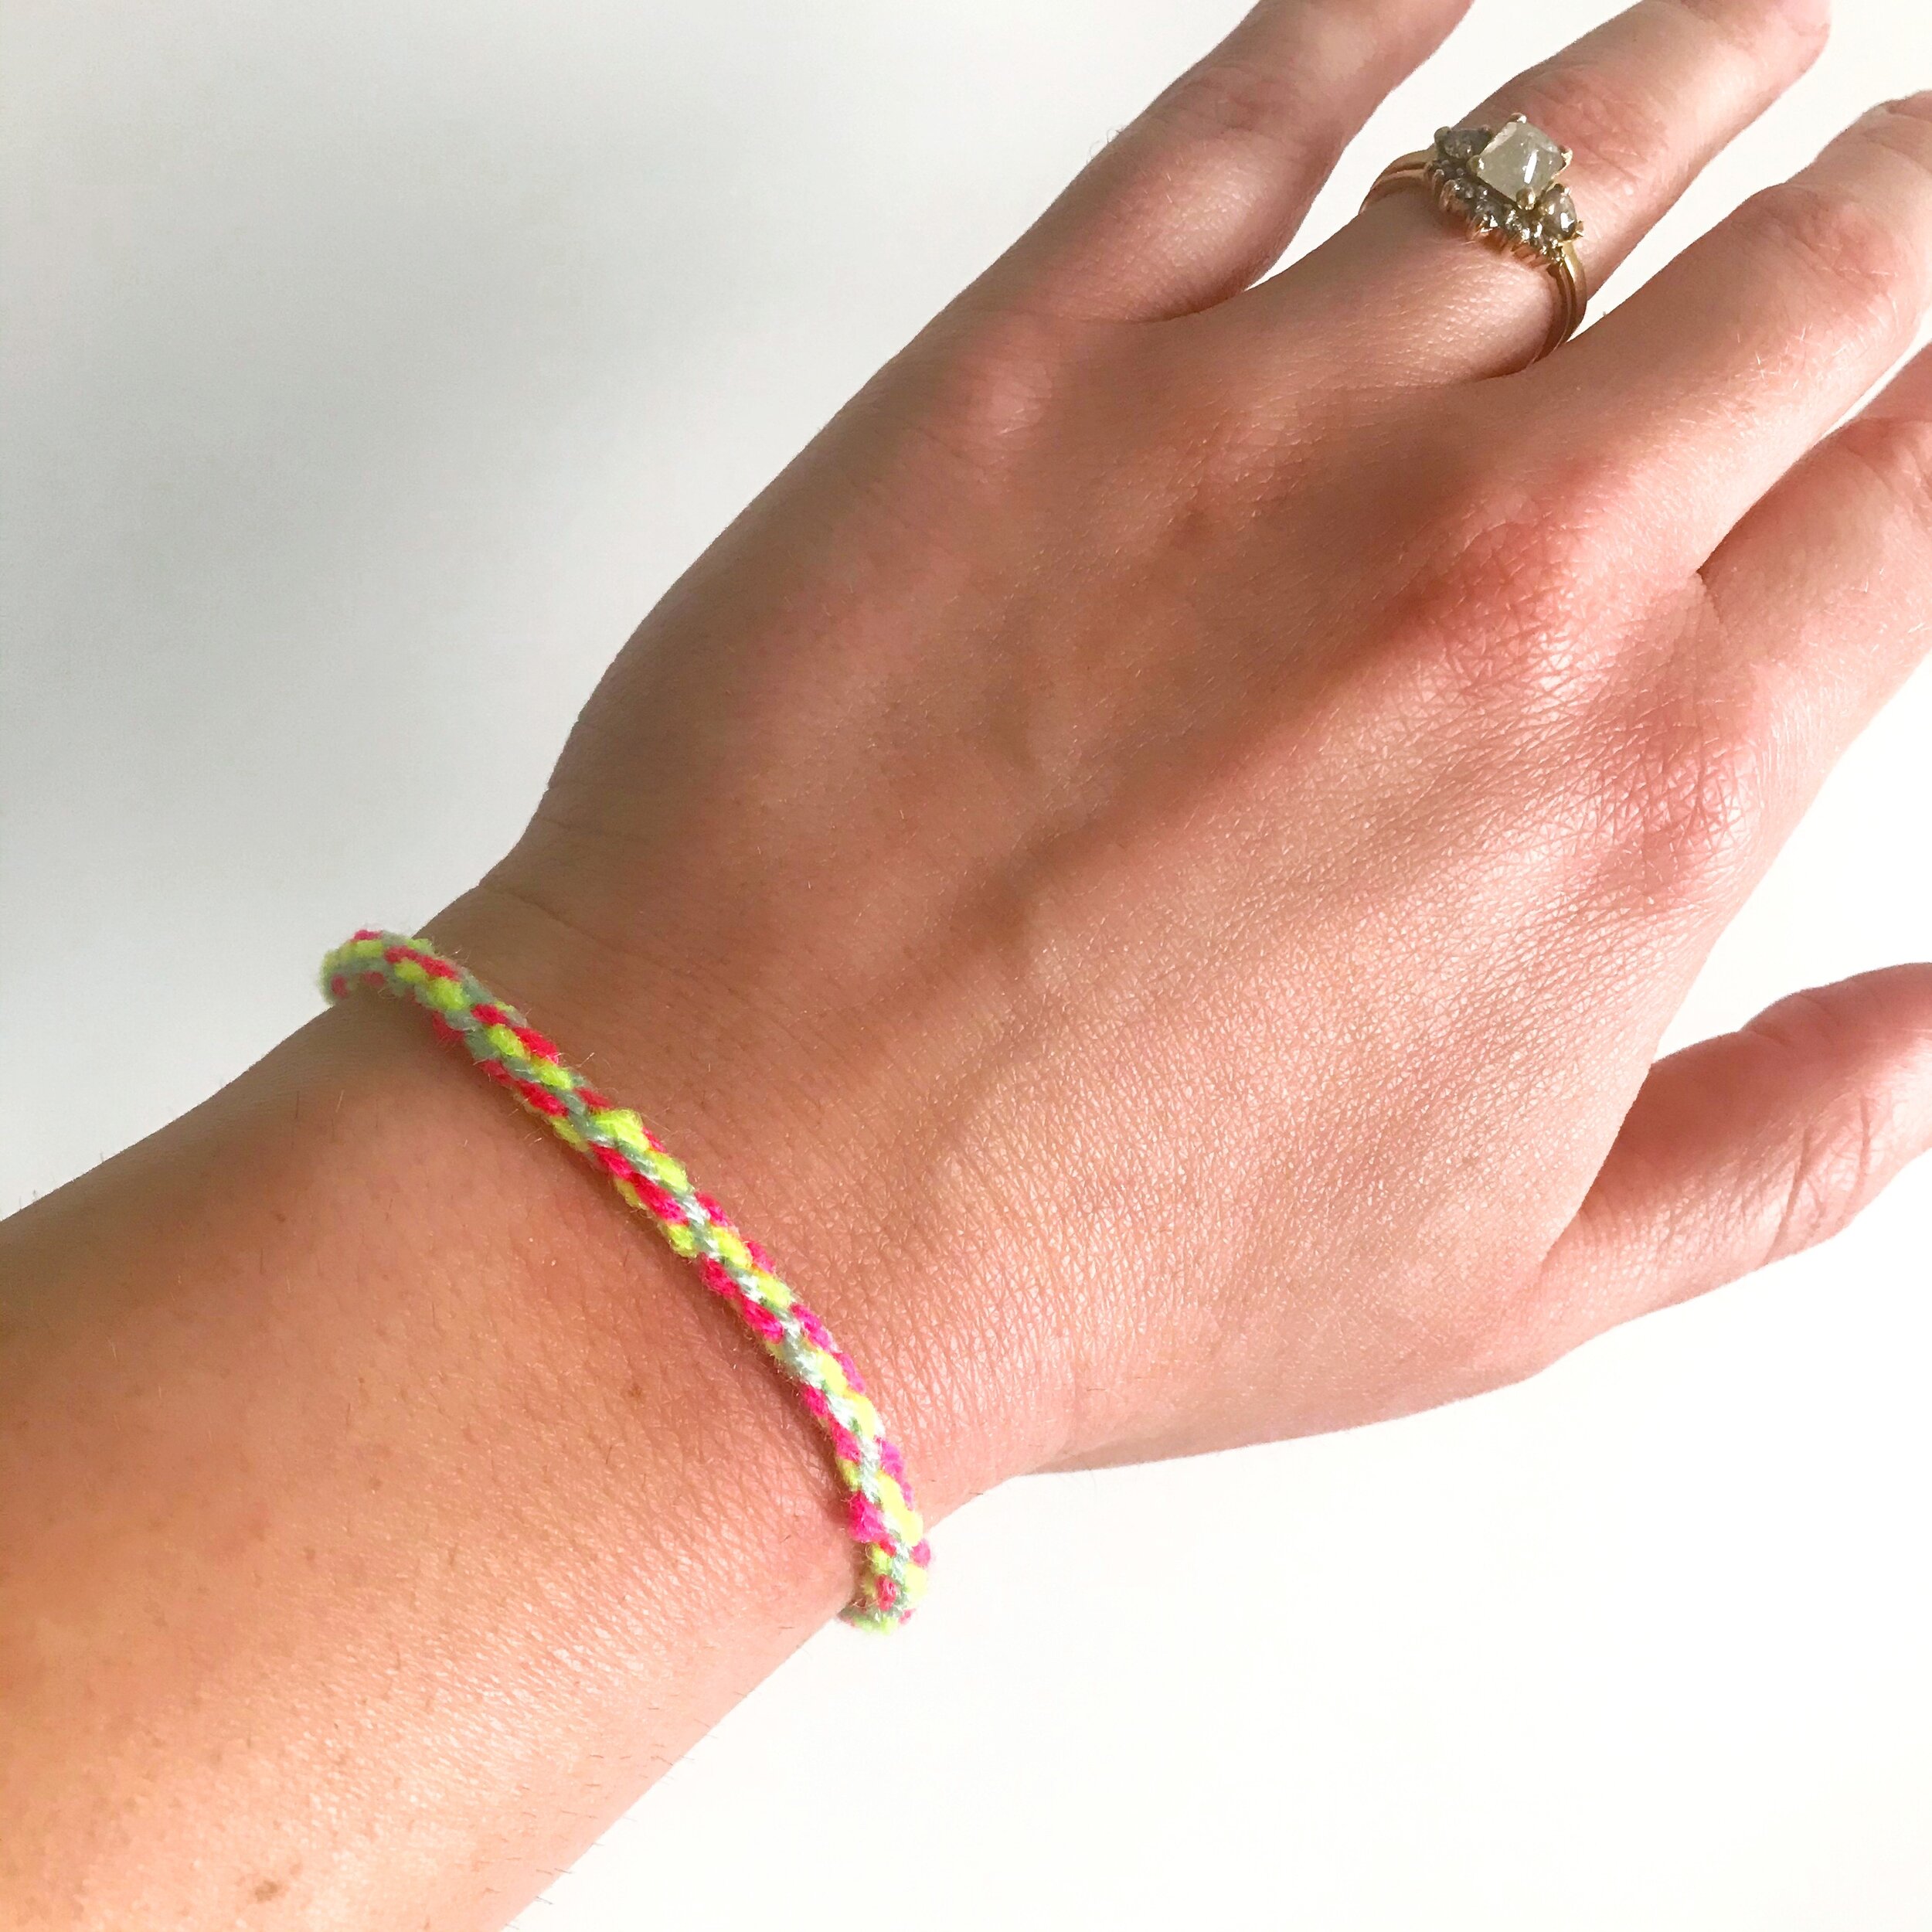
18. Tie your Kumihimo cord bracelet around your wrist!
I’m so excited to see what you make! Don’t forget to use the hashtag #scrapproject2020 if you post your Kumihimo cord on Instagram!
Happy Making!