The Scrap Project: Scrunchies

Scrunchies were one of my first sewing projects when I was 8 or 9 (in the 90s). They’re a great project for beginners and don’t require very much fabric to make. Whether you’re a 90s kid or VSCO girl, scrunchies are a great DIY to use up your fabric scraps or re-purpose old clothes! Since they’re fairly small, you can either sew them by hand or with a sewing machine. In this post, I’ll walk you through both the original and bow versions. Be sure to use the hashtag #scrapproject2020 if you post your scrunchies on Instagram!

Materials:
Fabric
Sewing machine or needle
Thread
Sewing pins
Elastic
Safety pin
Scissors
Measuring tape
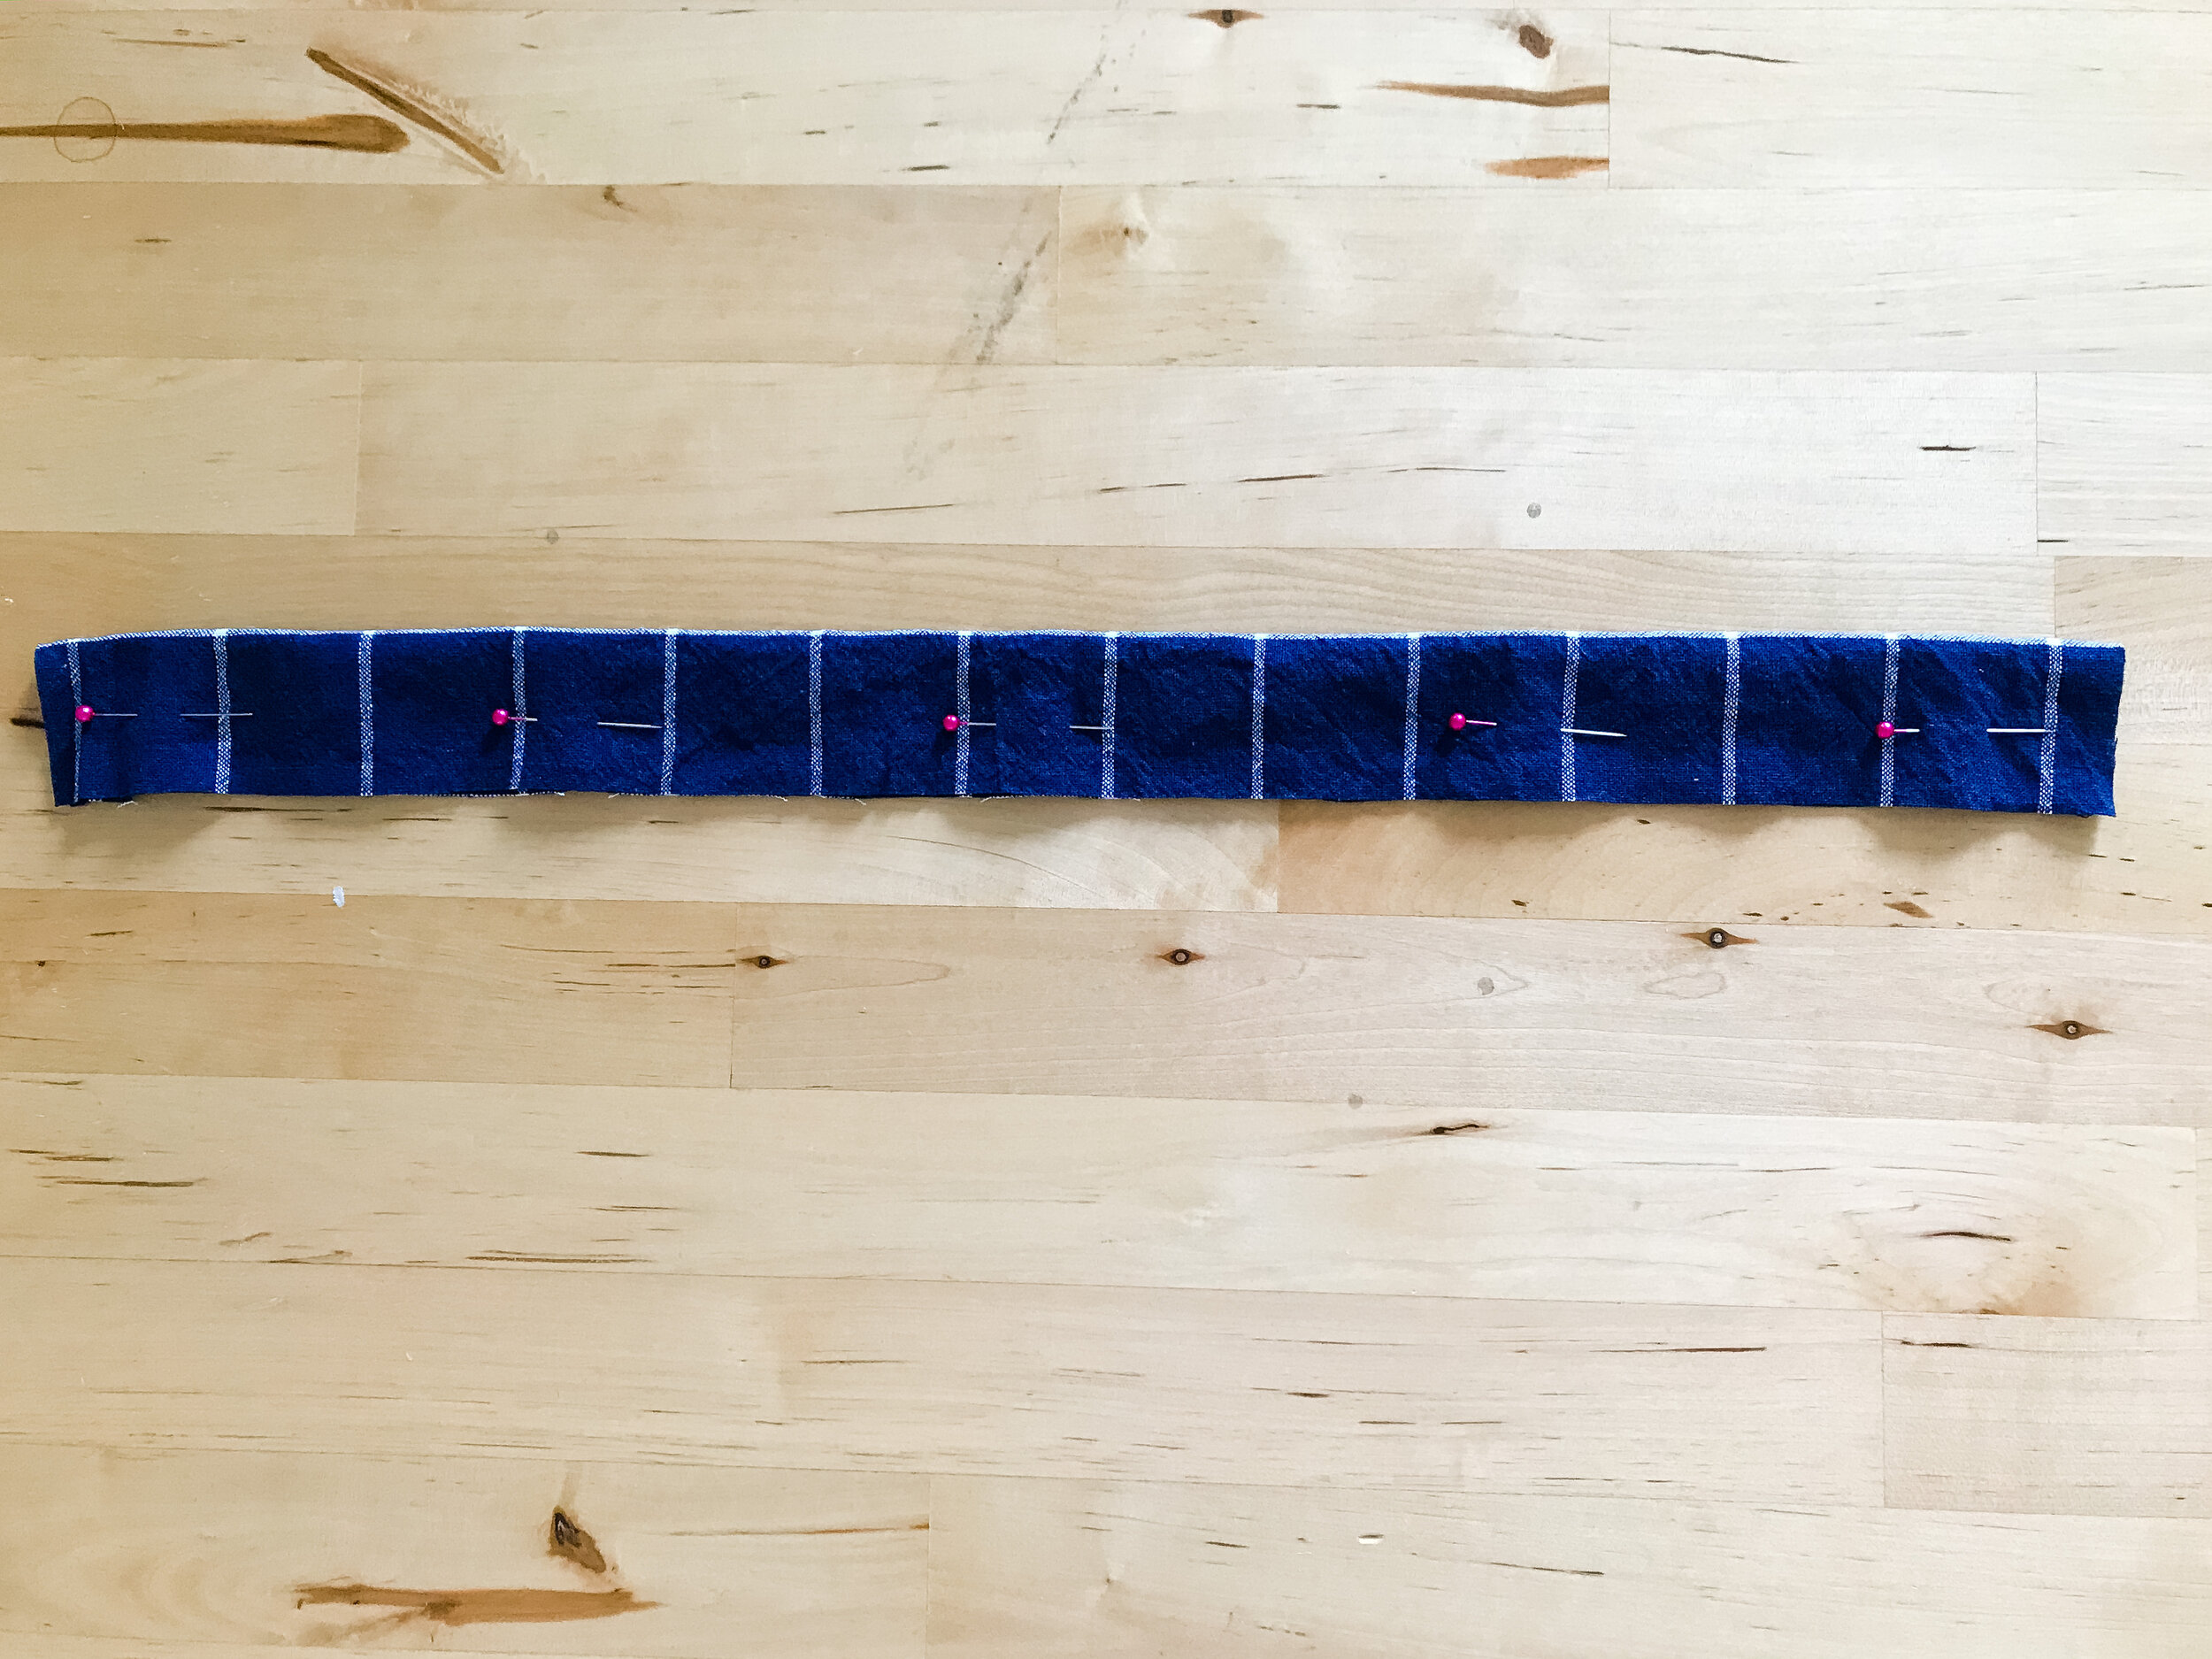
1. Cut a 3” x 20” piece of fabric. Fold in half with the “wrong” side of the fabric facing out and pin. Your folded fabric should now measure 1.5” x 20”.

2. Sew along the raw edge, leaving the ends open. We are making a tube with our fabric inside out.

3. Turn your tube of fabric right side out. You can attach a safety pin to the edge and push it through the tube to assist with this step.

4. Cut an 8” piece of 1/2” or 1/4” elastic. I didn’t have any elastic at home, so I cut the band off of an old sports bra that’s too small for me. Check your donation pile for clothes with elastic waistbands if you’re in a pinch.

5. Attach your safety pin to one end of your 8” piece of elastic.

6. Start to push the safety pin through the fabric tube.

7. Keep one hand on the other end of your elastic as you push the safety pin through. Your fabric will start to scrunch because you are condensing 20” of fabric into 8”.

8. Your safety pin should appear on the other end of the fabric tube.

9. It’s starting to look like a scrunchie!

10. Overlap the two ends of your elastic slightly and sew over them to create an elastic loop inside your scrunchie.

11. Tuck one end of your fabric over the other. Fold the raw edges under and sew across to secure the fabric in place.

12. Ta-da! For an original version of the scrunchie, stop here.

13. If you would like to add a bow, fold another piece of fabric in half and cut a petal shape from the folded edge. Mine is approximately 4” long and 2” at the widest part of the petal.

14. Cut a second petal shape.
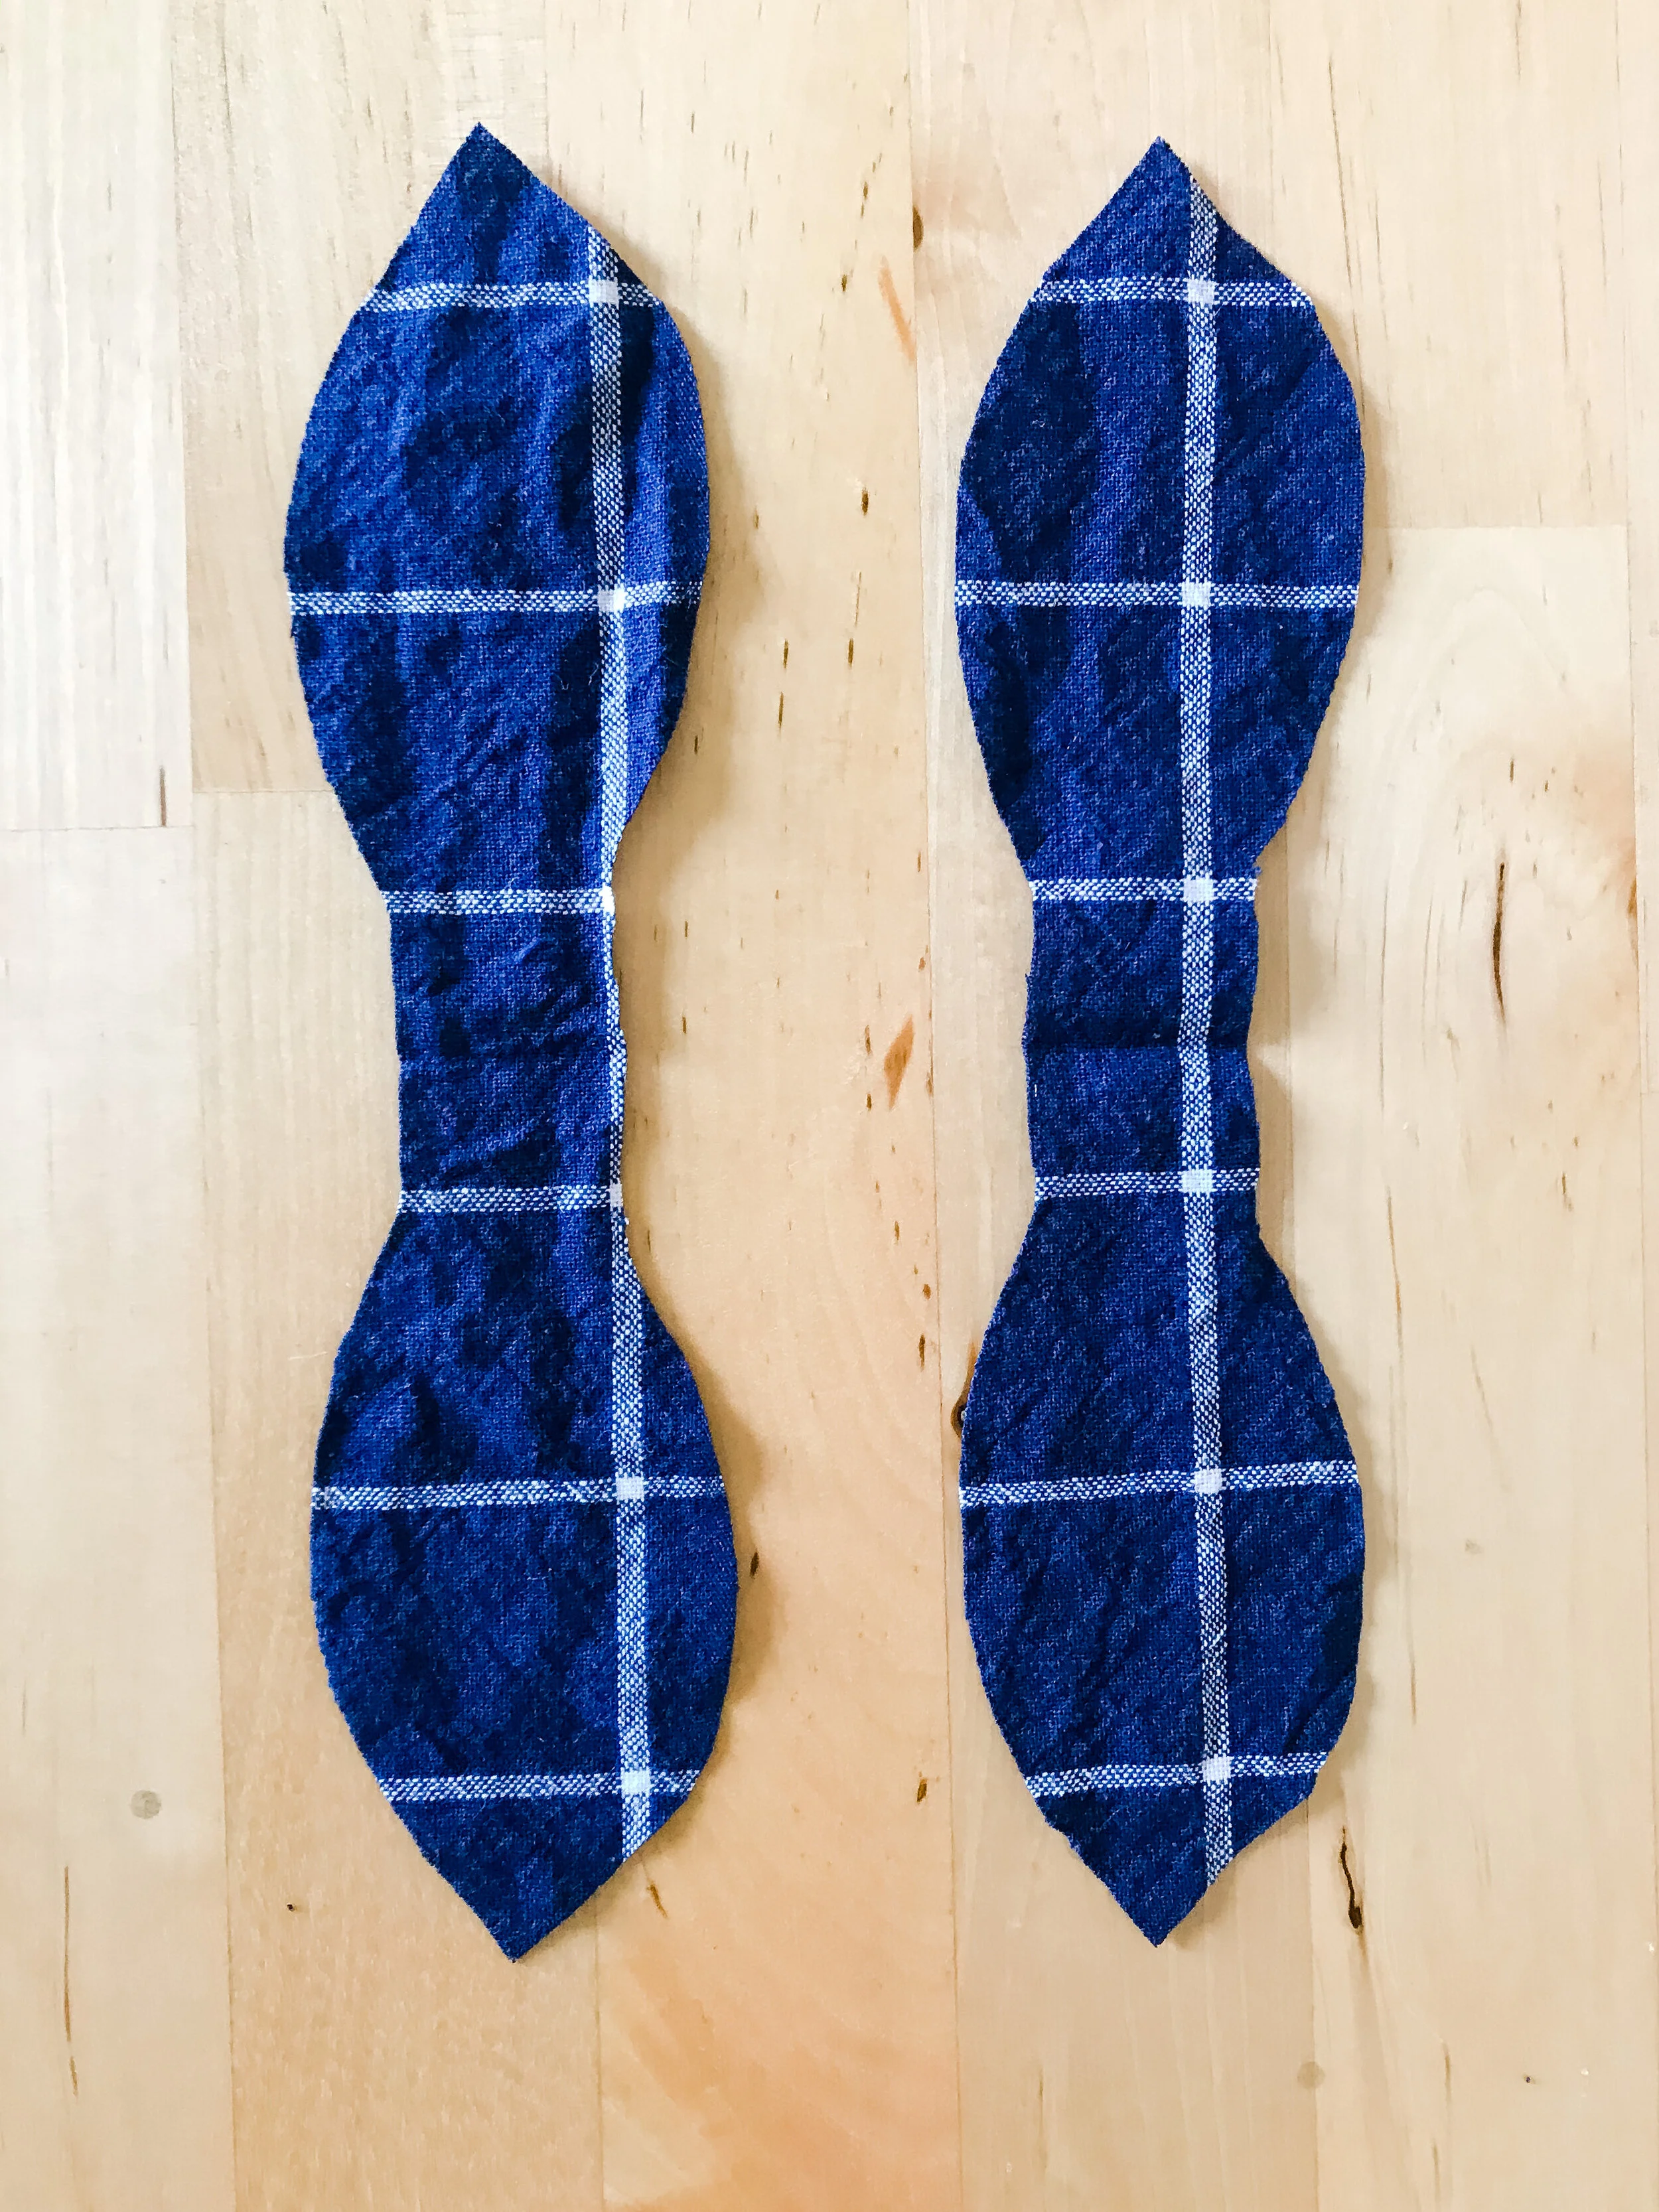
15. Open them up. They should look like two bow ties.

16. Pin your two bow tie shapes together with the “wrong” side of the fabric facing out. Don’t sew over the middle of the bow tie.

17. Sew your inside out bow tie.

18. Turn your bow tie right side out by pushing the two ends through the opening you left in the middle. Use a pencil to poke out the corners from inside the bow tie.

17. Fold the raw edges into the middle of your bow tie.

18. Sew the middle of your bow tie closed.
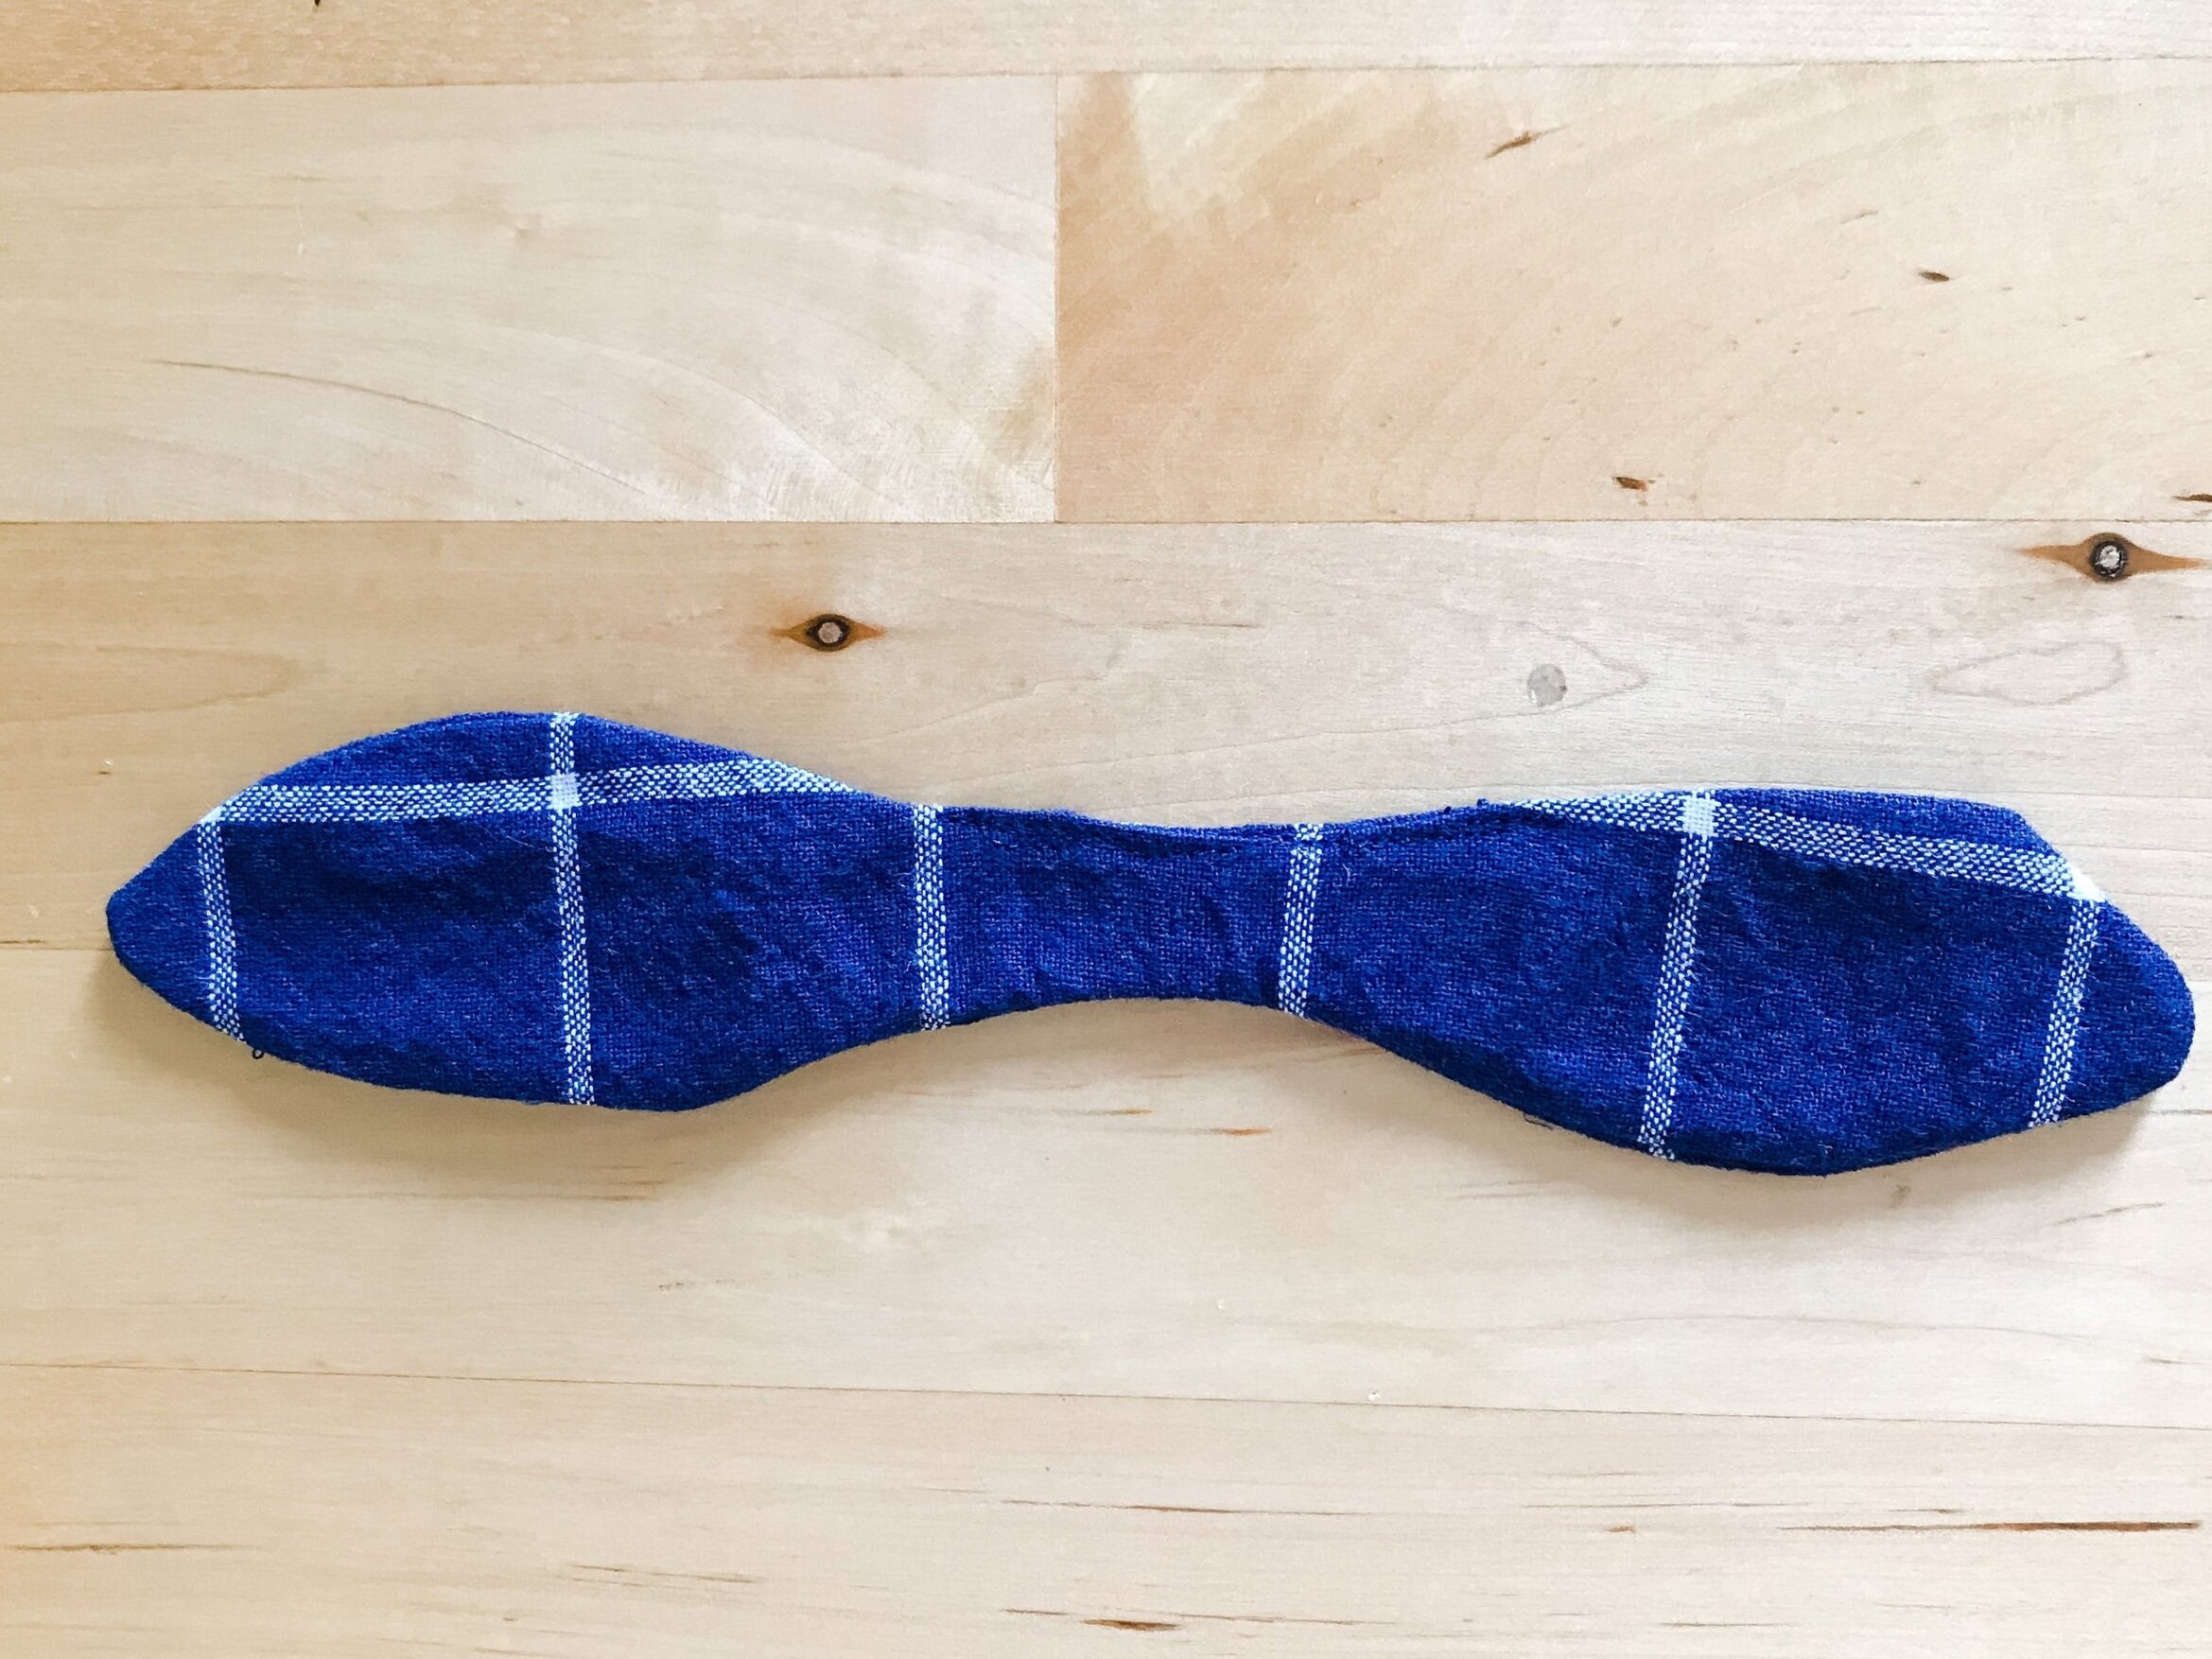
19. Your bow tie is complete!

20. Grab your scrunchie.
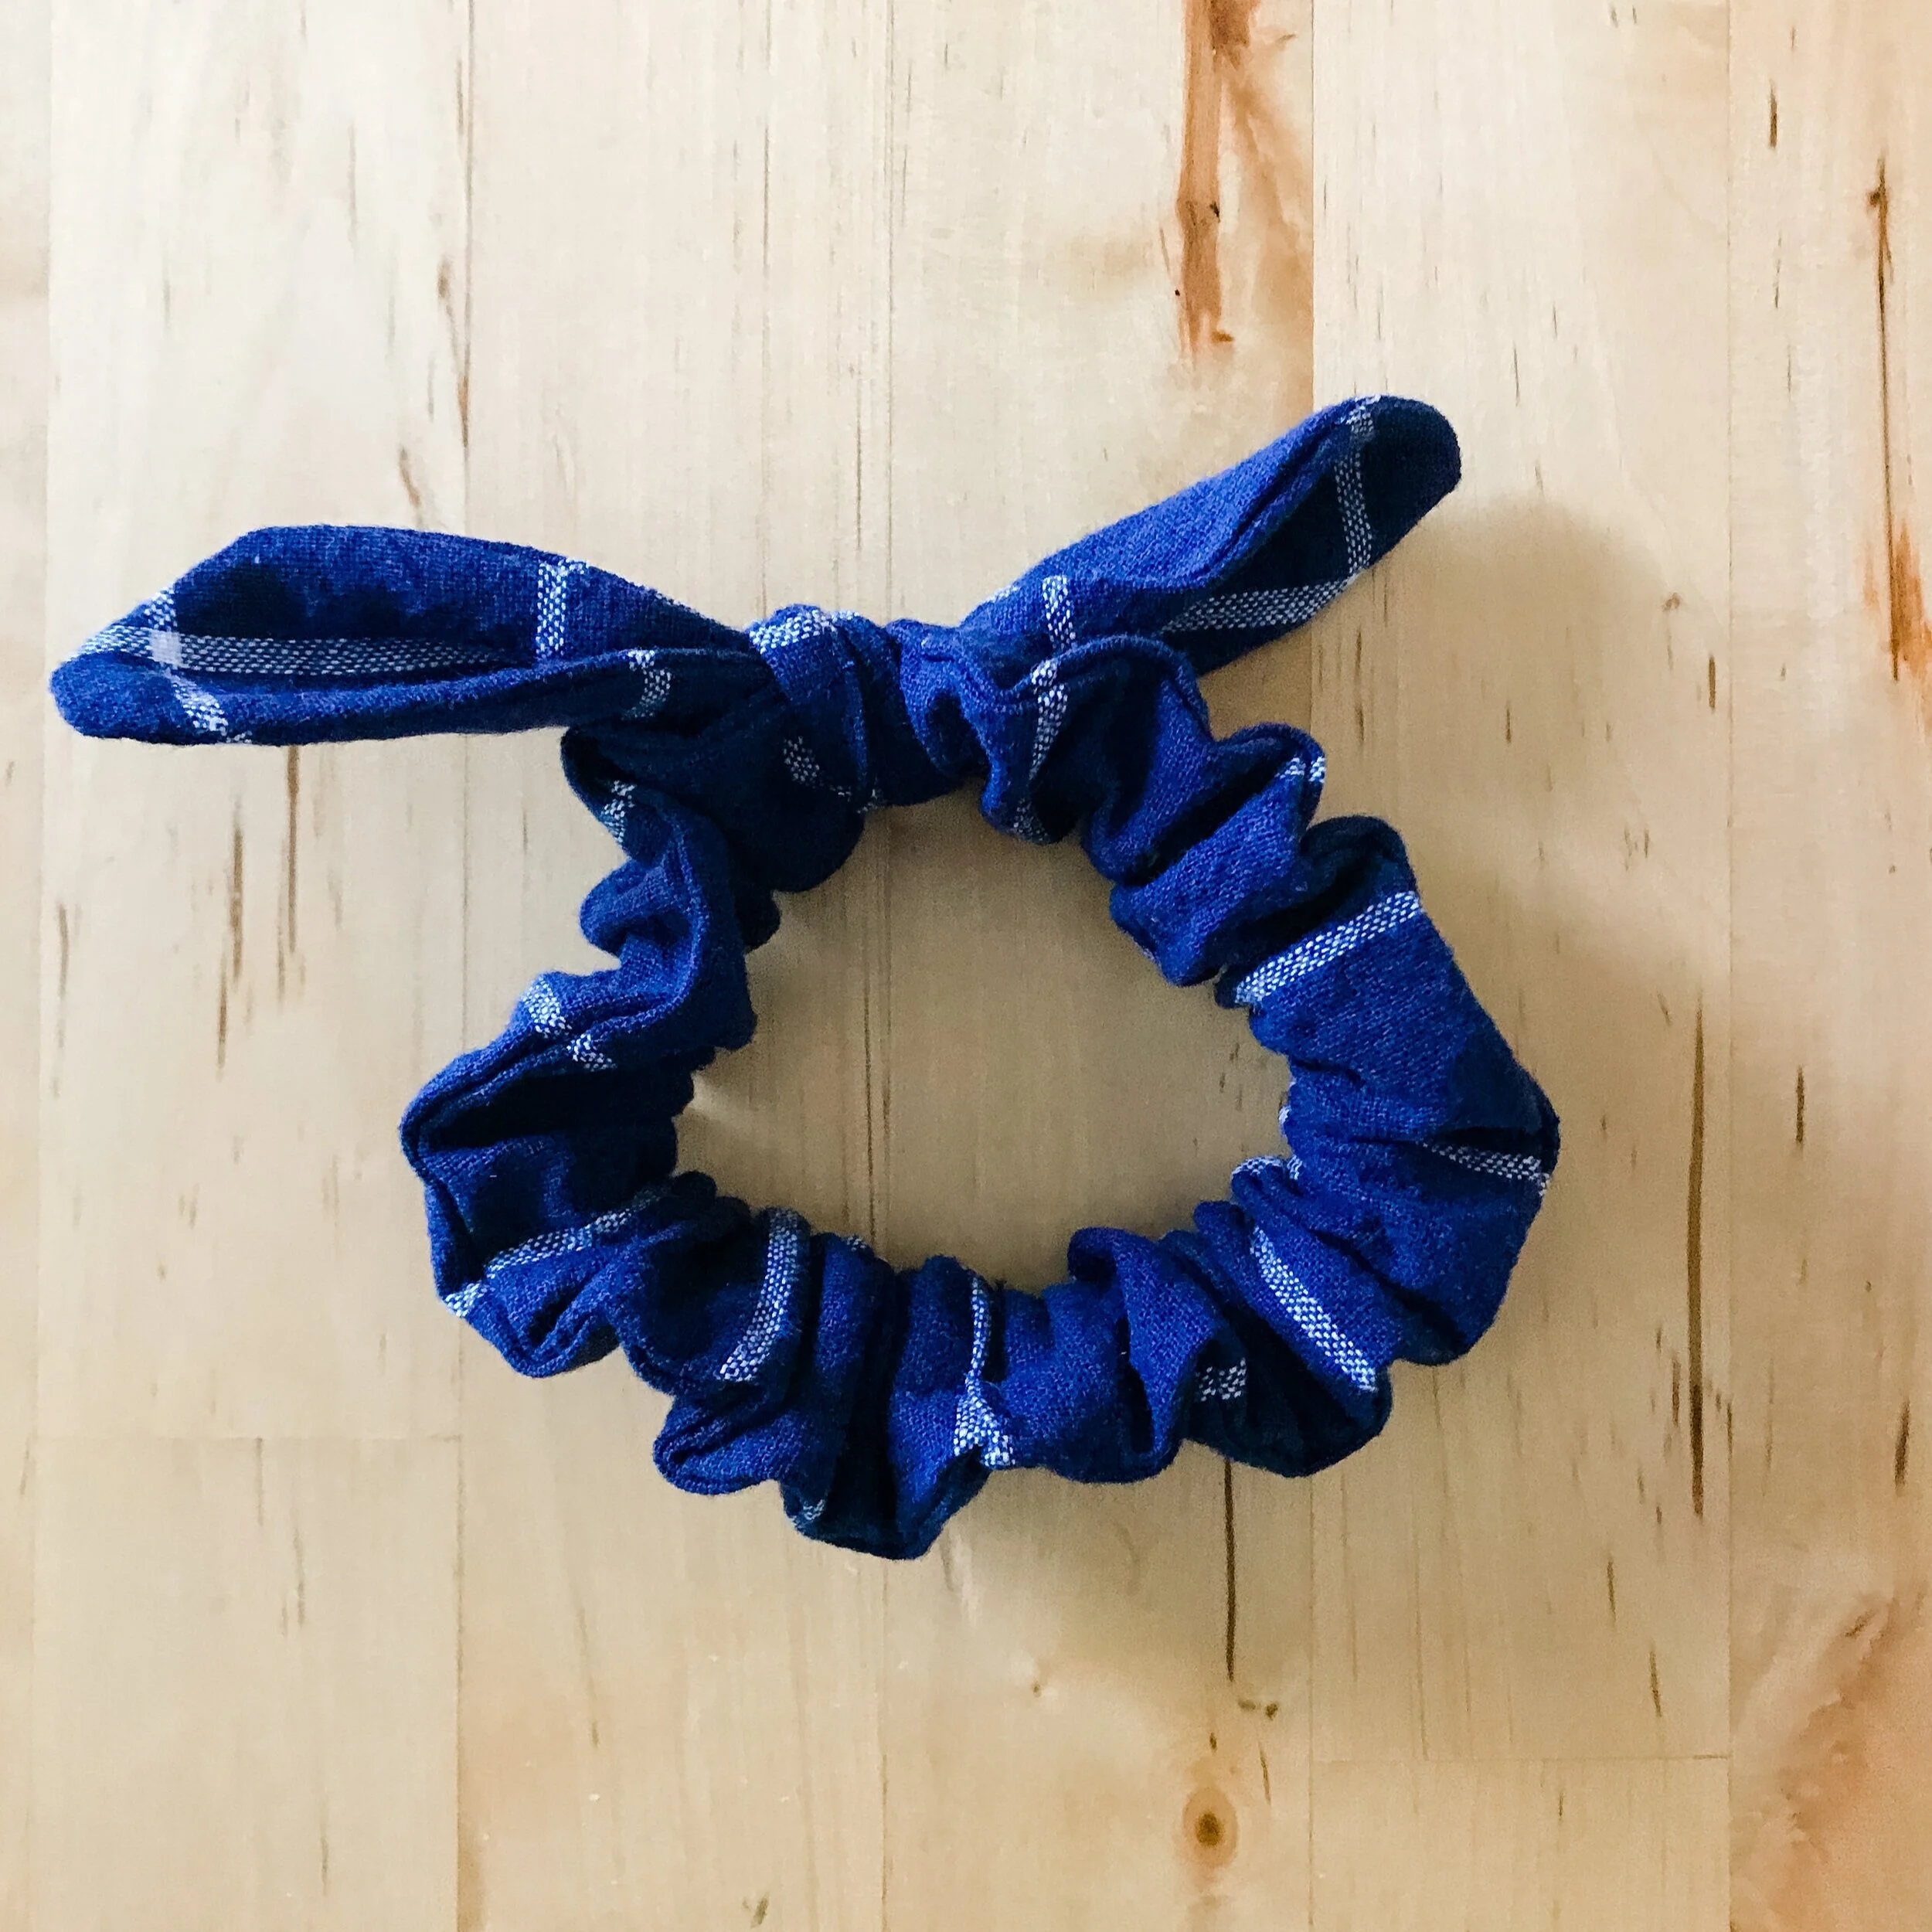
21. Tie the bow tie in a knot around the scrunchie.

22. Throw your hair in a messy bun and get things done!

You can experiment with the size and shape of the bow tie to make your scrunchie look more like a scarf than a bow!
For this one, I cut the bow tie 7” long from my folded fabric (14” when unfolded).
I’m so excited to see what you make! Don’t forget to use the hashtag #scrapproject2020 if you post your scrunchies on Instagram!
Happy Making!