Color Pop Plant Hanger
Introduction

Hi there!
My name is Taylor and I’m the fiber artist behind Myth and Moss. I’ve taught macrame workshops to over 100 students across four states and I’m so excited to share this craft with you!
Below you’ll find the information I share with my workshop participants on how to create a macrame plant hanger.
Please don’t hesitate to email me at taylor@mythandmoss.com with any questions.
Happy making!
Materials
If you have purchased one my plant hanger kits, you will find the following materials inside. If you are using your own materials, the following list includes my recommendations for a 3 ft long plant hanger, ideal for holding 4-6 inch potted plants:
One wooden ring
100 ft of cotton macrame rope (3/16” diameter)
5 ft of colorful macrame rope
Hooks for hanging your finished plant hanger
Preparation
1. Cut your 100 ft bundle of rope into the following lengths:
12.5 ft x 8 pieces
2. Cut your colorful rope into two 2.5 ft pieces.
3. Thread the 8 pieces of natural rope through the wooden ring, so that the middle of each piece rests on the ring.
4. You can use the hooks provided to hang your plant hanger by the wooden ring while working.
Design

Use one piece of the colorful rope to tie a gathering knot.
You should have 4 sets of 4 pieces of natural rope. Knot 8 square knots for each.
Leave 3 inches of open space.
Knot 4 square knots.
Leave 3 inches of open space.
Knot one square knot.
Knot one more square knot in a cross hatch pattern.
Tie another gathering knot using the second piece of colorful rope.
Trim and unravel the ends, if desired.
macrame knots
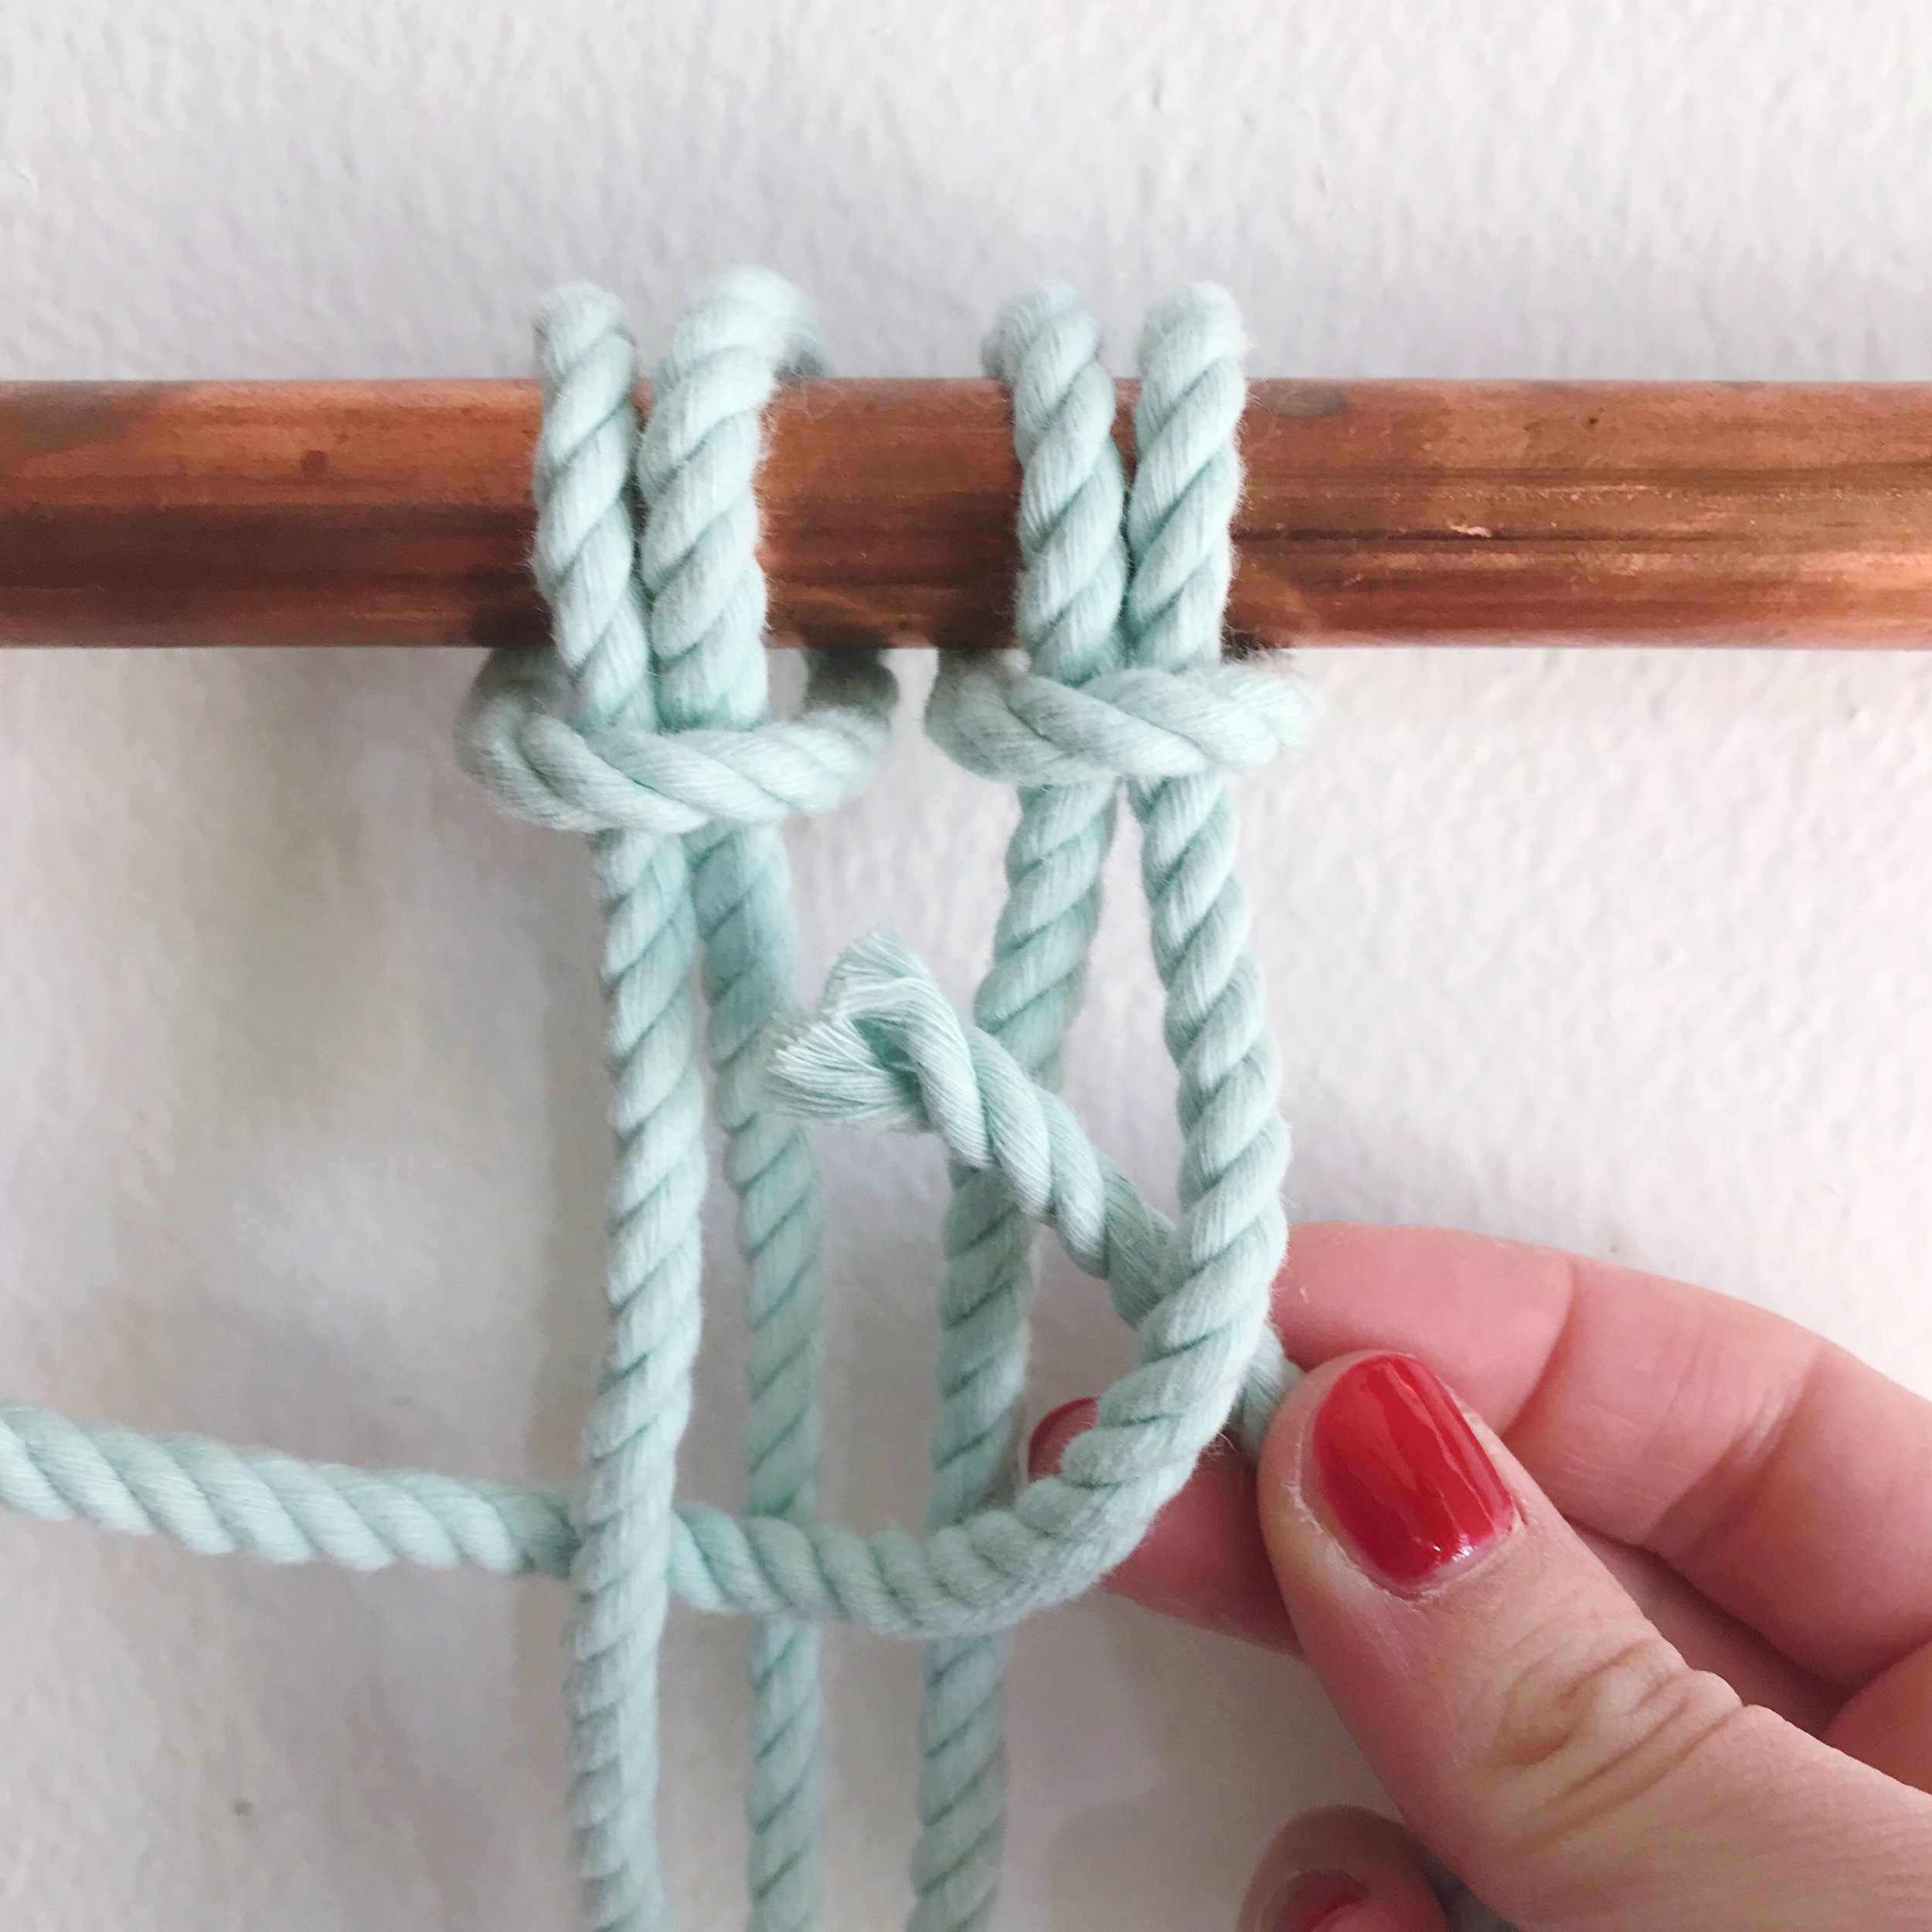
Square Knot
1. Start with four cords hanging vertically. For this knot, you will only be moving the two outside cords. Position the right cord over the middle two cords and under the left cord.
2. Passing under the middle cords, pull the left cord through the loop created by the right middle cord and the right cord and tighten. This is a half square knot.
3. Position the left cord over the middle cords and under the right cord.
4. Passing under the middle cords, pull the right cord through the loop created by the middle left cord and the left cord and tighten. This is your full square knot.


my favorite Supplies
Not an #ad - this is just a list of businesses I have frequently purchased supplies from.
Knot and Rope Supply – Natural cotton and nylon rope
Modern Macrame – Colorful three-strand rope, supplies, and kits
Niroma Studio – Single strand and three-strand cotton rope
Nova Mercury – Colorful rope, supplies, and kits
Further Learning
Also not sponsored…. These are resources I have found helpful in learning new macrame and weaving techniques.
Elsie Goodwin – Free instructional videos for macrame knots
Hello Hydrangea – Online courses in weaving and macrame
Copyright © 2020 by Taylor Riley Du. All rights reserved. This information is intended for personal use only.